Add a User Task to the Process (4/6)
In this section, you'll learn how to involve humans in your process by using BPMN 2.0 User Tasks.
Add a User Task
We want to modify our process so that we can involve humans.
To do so, open the process in the Operaton Modeler.
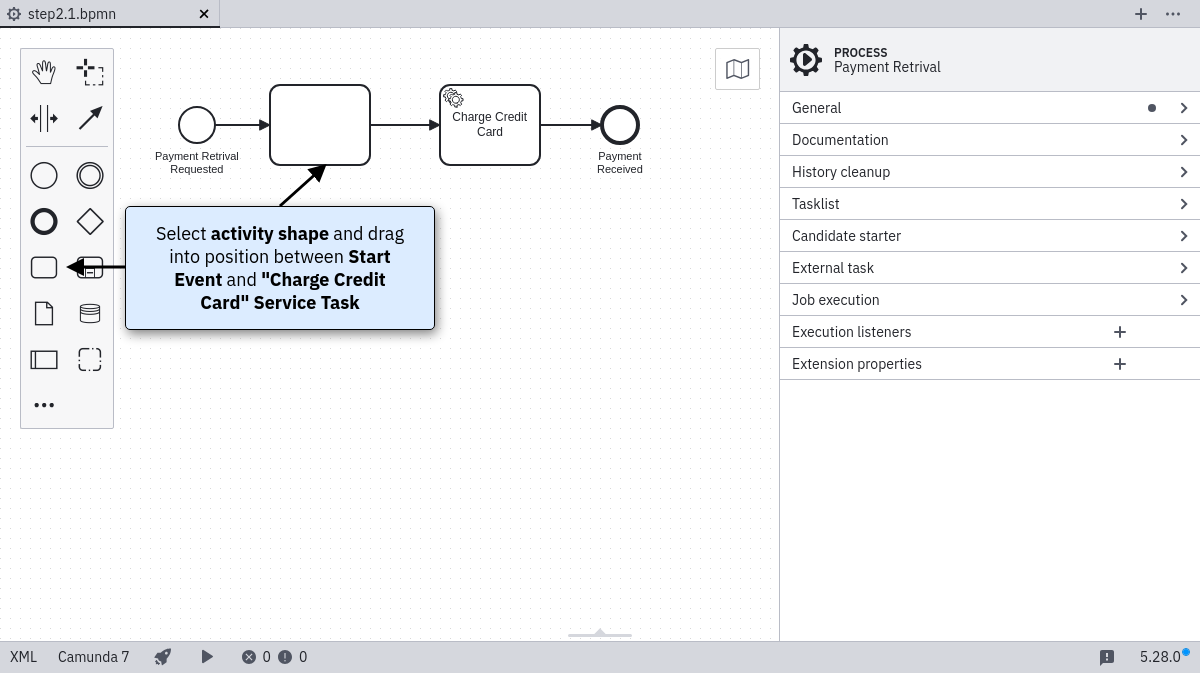
Select the create/remove space tool || from the Modeler's left-hand menu, and use it to create space between the Start Event and the "Charge Credit Card" Service Task (click and drag the cursor to the right).
Next, from the Modeler's left-hand menu, select the activity shape (rounded rectangle) and drag it into position between the Start Event and the "Charge Credit Card" Service Task. Name it Approve Payment.
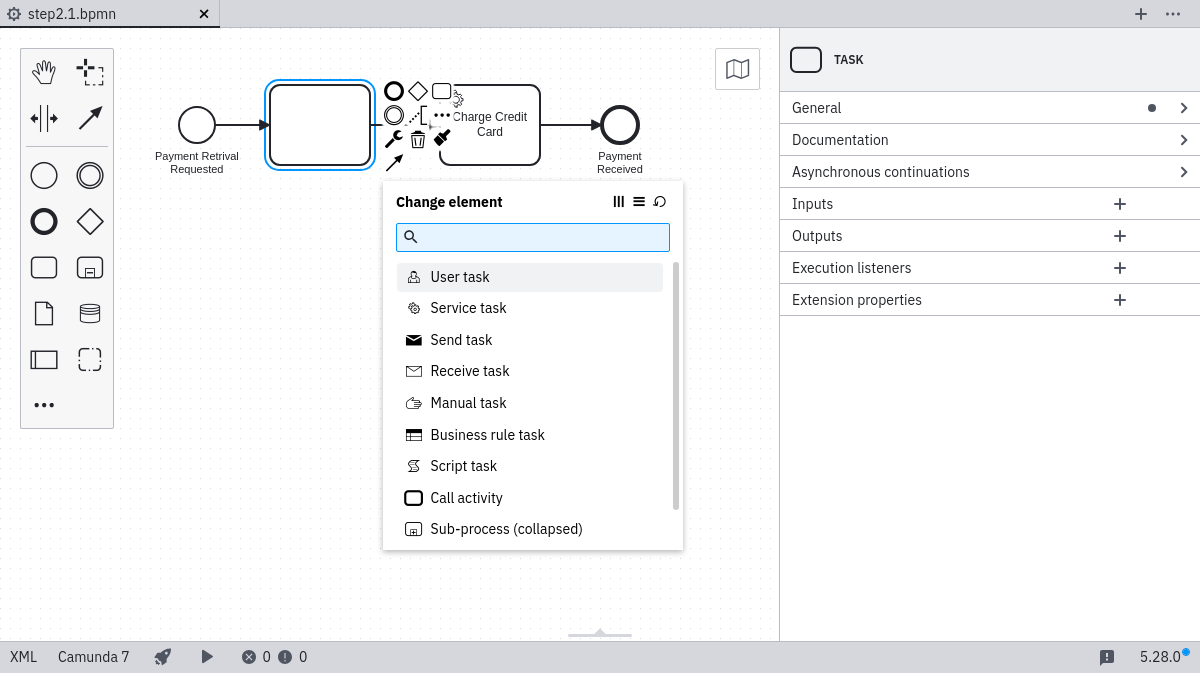
Change the activity type to User Task by clicking on it and using the wrench button menu.
Configure a User Task
Next, open the properties view. If the properties view is not already visible, click on the "Properties Panel" label on the right-hand side of the Modeler canvas.
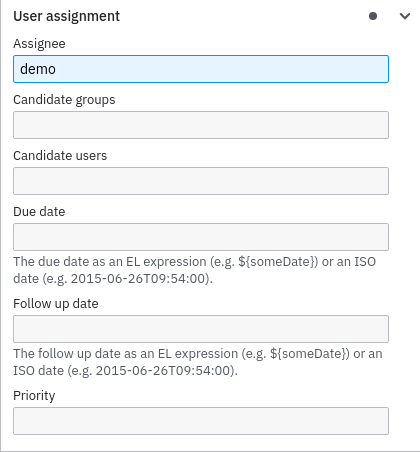
Select the User Task on the canvas. This will update the selection in the properties view. Scroll to the property named Assignee.
Type demo to automatically assign the task to the demo user once the process runs.
Configure a basic form in the User Task
This step will also take place in the properties panel. If the panel is not already visible, click on the "Properties Panel" label on the right-hand side of the Modeler canvas.
Select the User Task on the canvas. This will update the selection in the properties view.
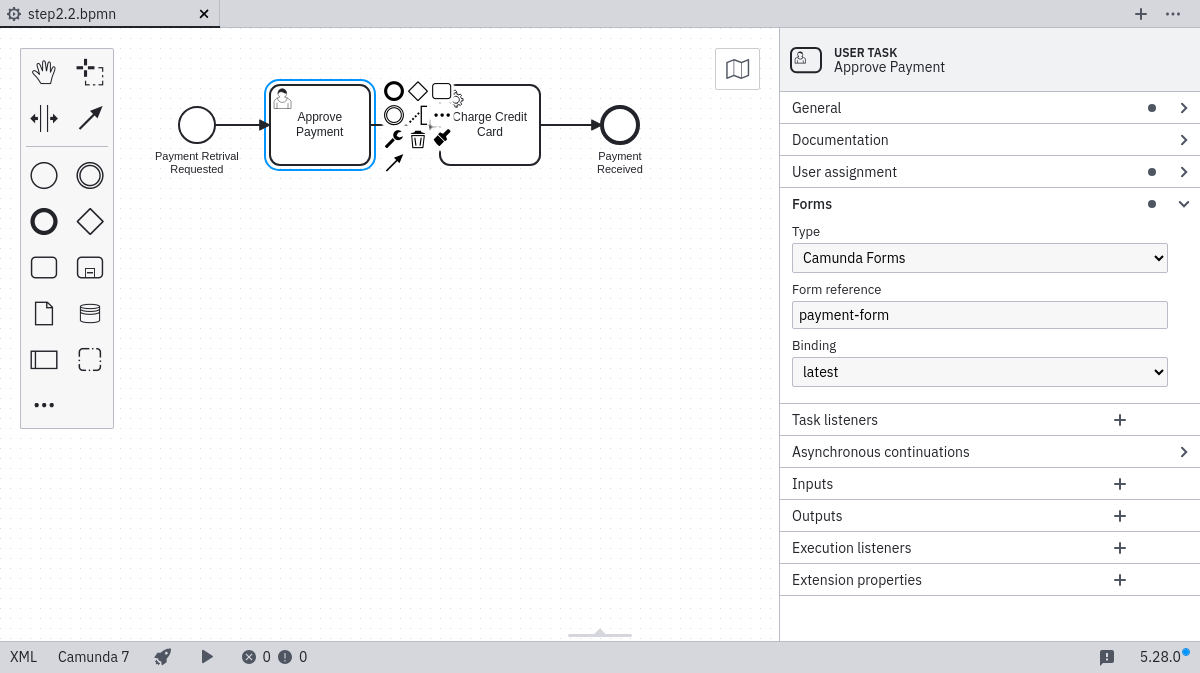
Click on the Tab Forms in the properties panel.
This guide uses Operaton Forms to add a form to the process.
We will create a form file called payment.form.
Set the following fields to link this process to the form you are about to create:
- Type: Operaton Forms
- Form Ref: payment-form
- Binding: deployment
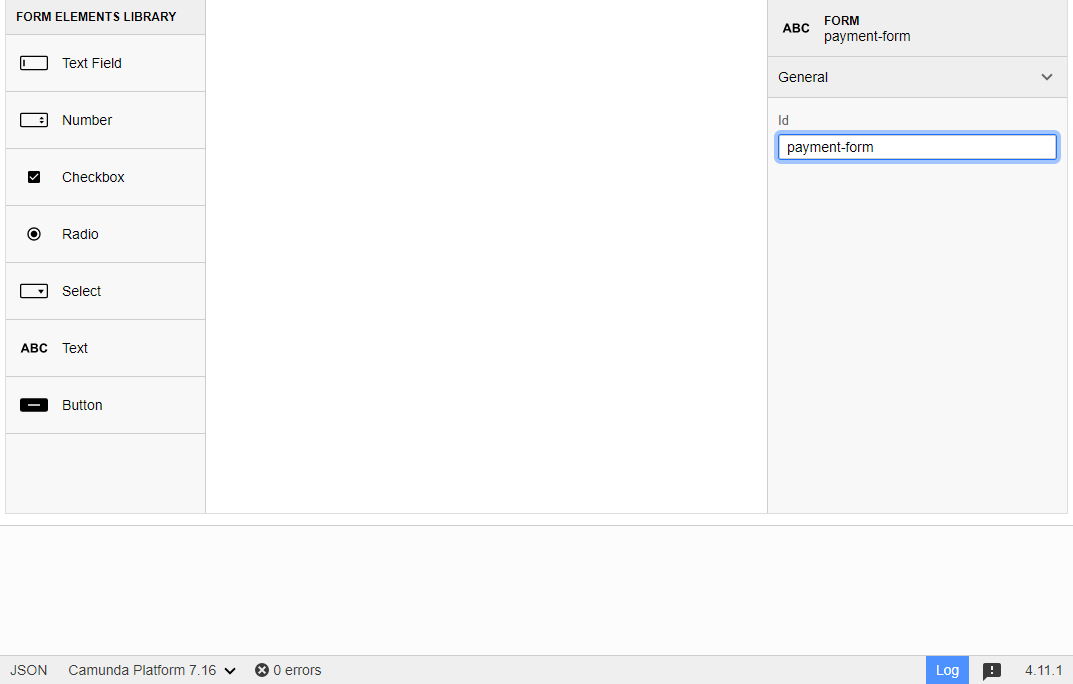
Now, create a new form by clicking File > New File > Form and add payment-form as the Id field.
You can add form fields by dragging and dropping elements from the FORM ELEMENTS LIBRARY on the left. Add the following three form fields:
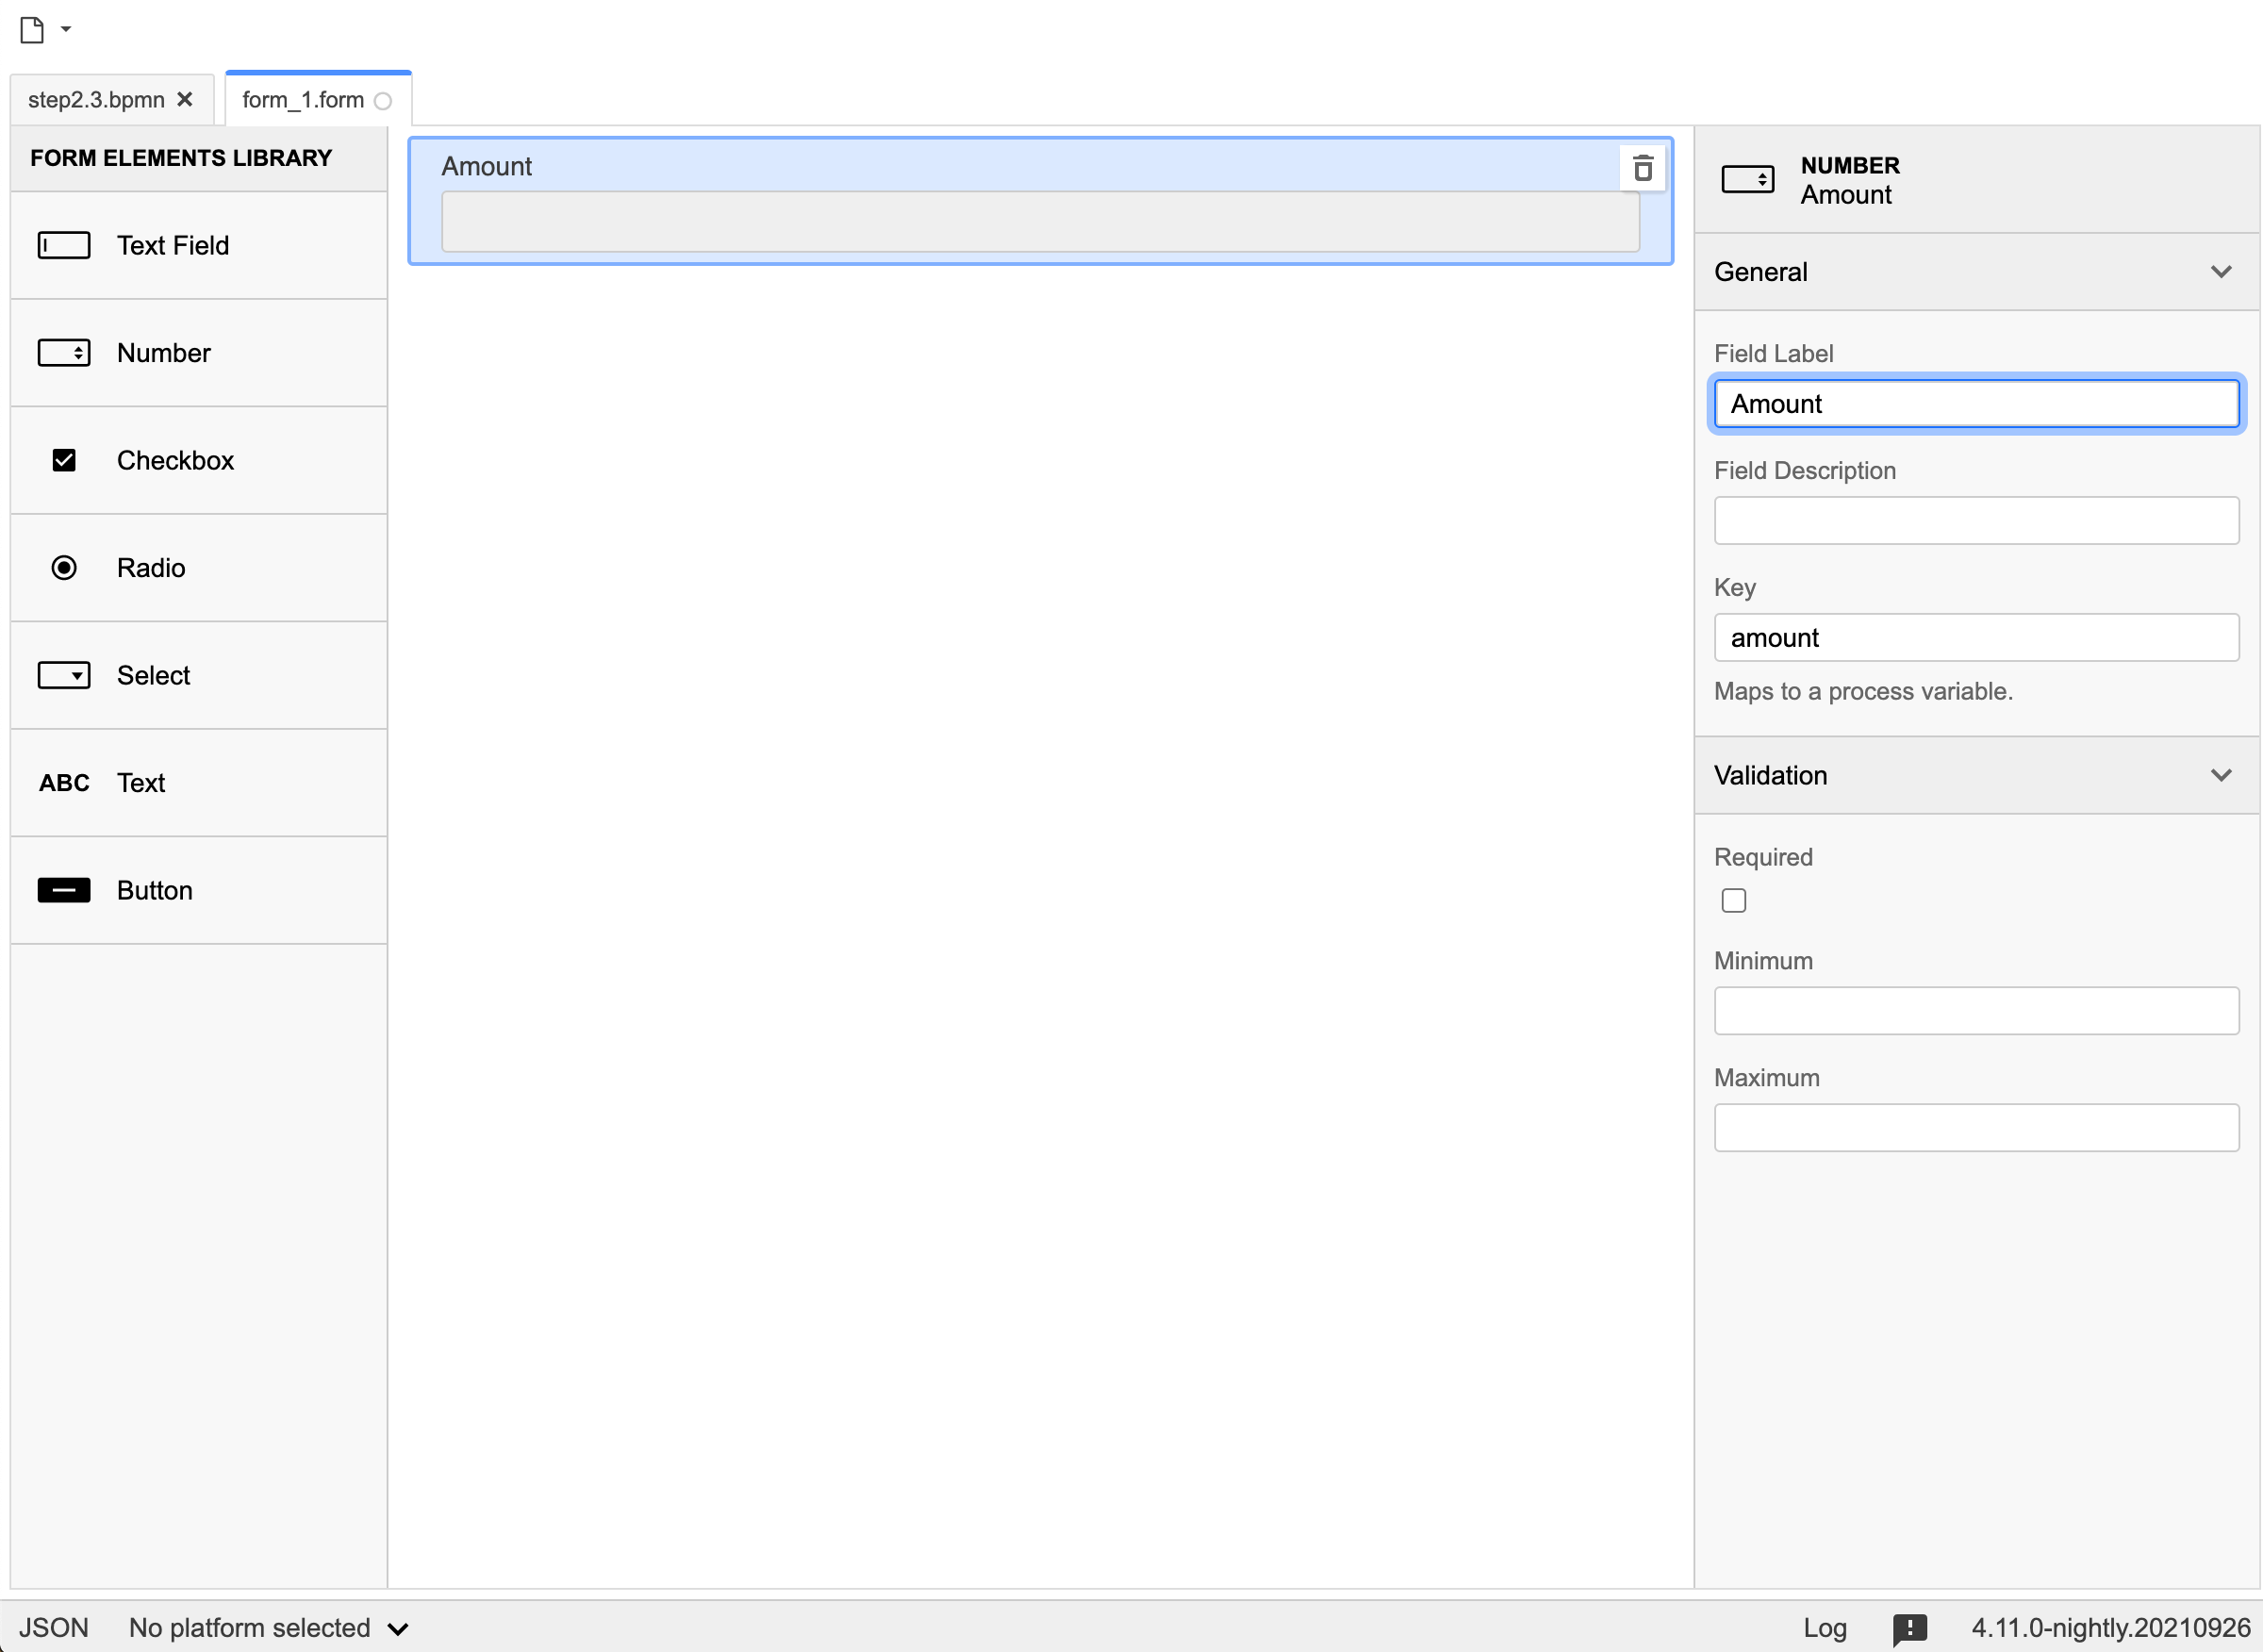
Field 1:
- Type: Number
- Key: amount
- Field Label: Amount
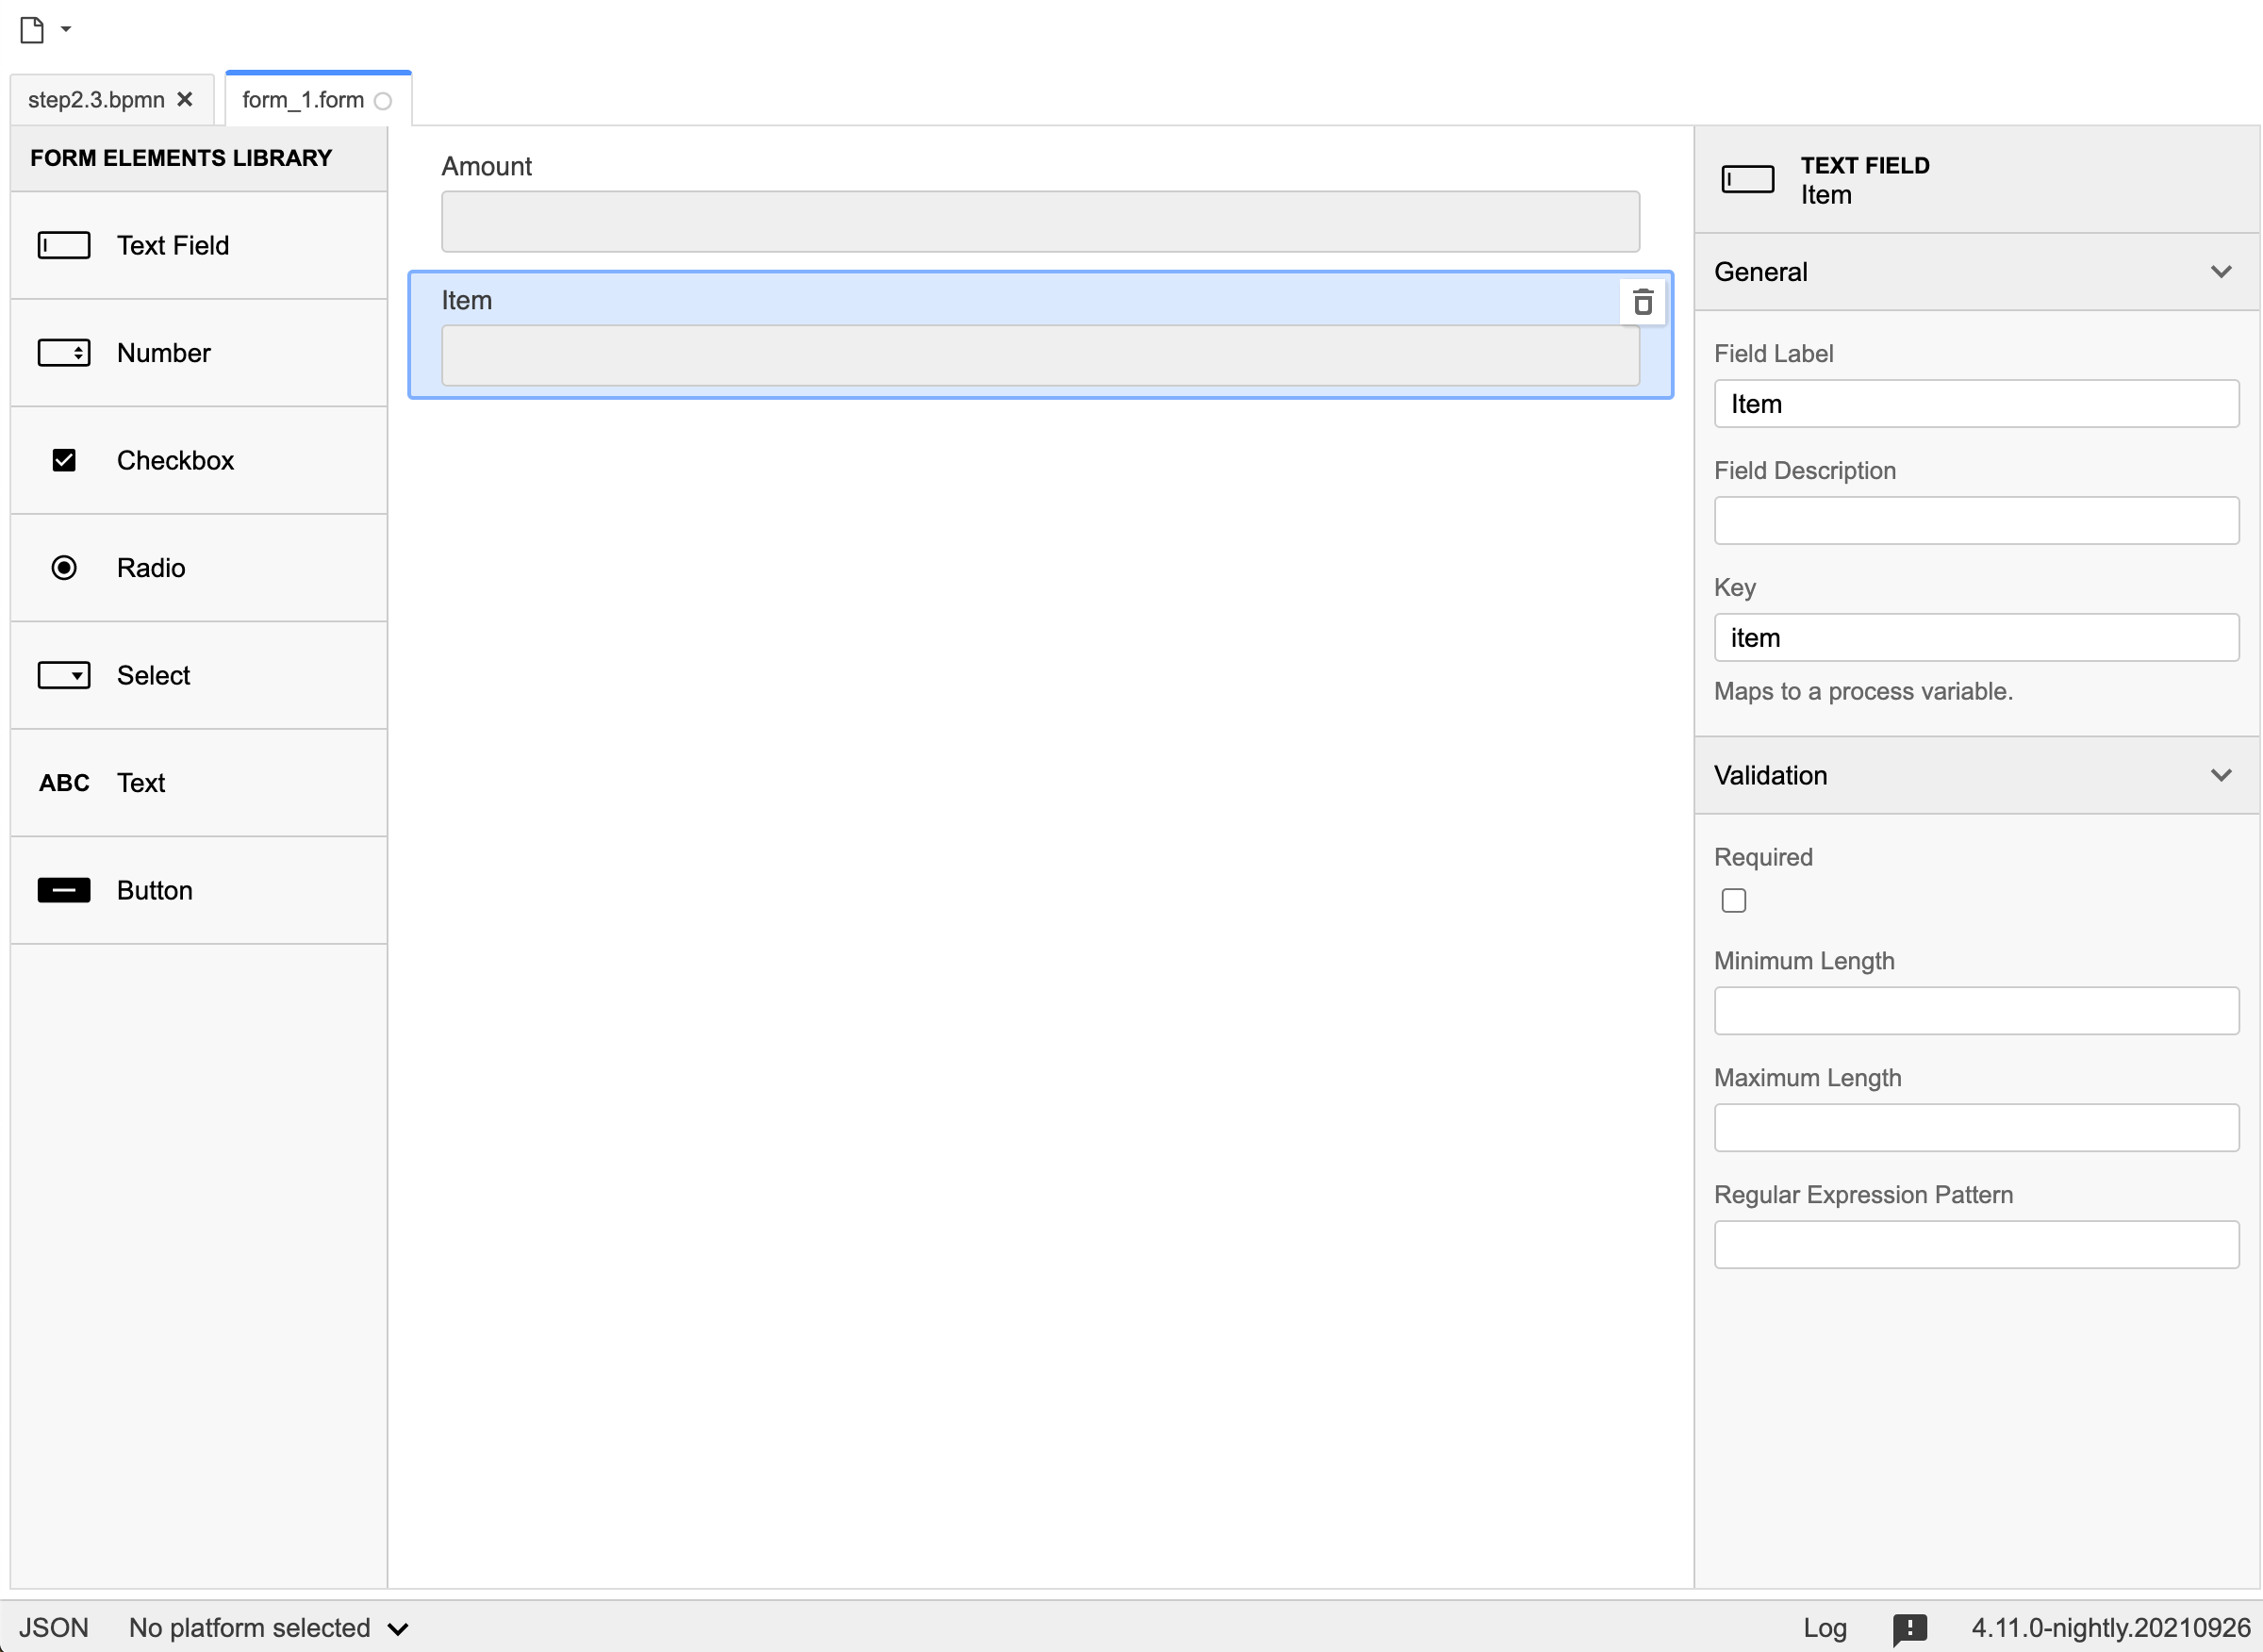
Field 2:
- Type: Text Field
- Key: item
- Field Label: Item
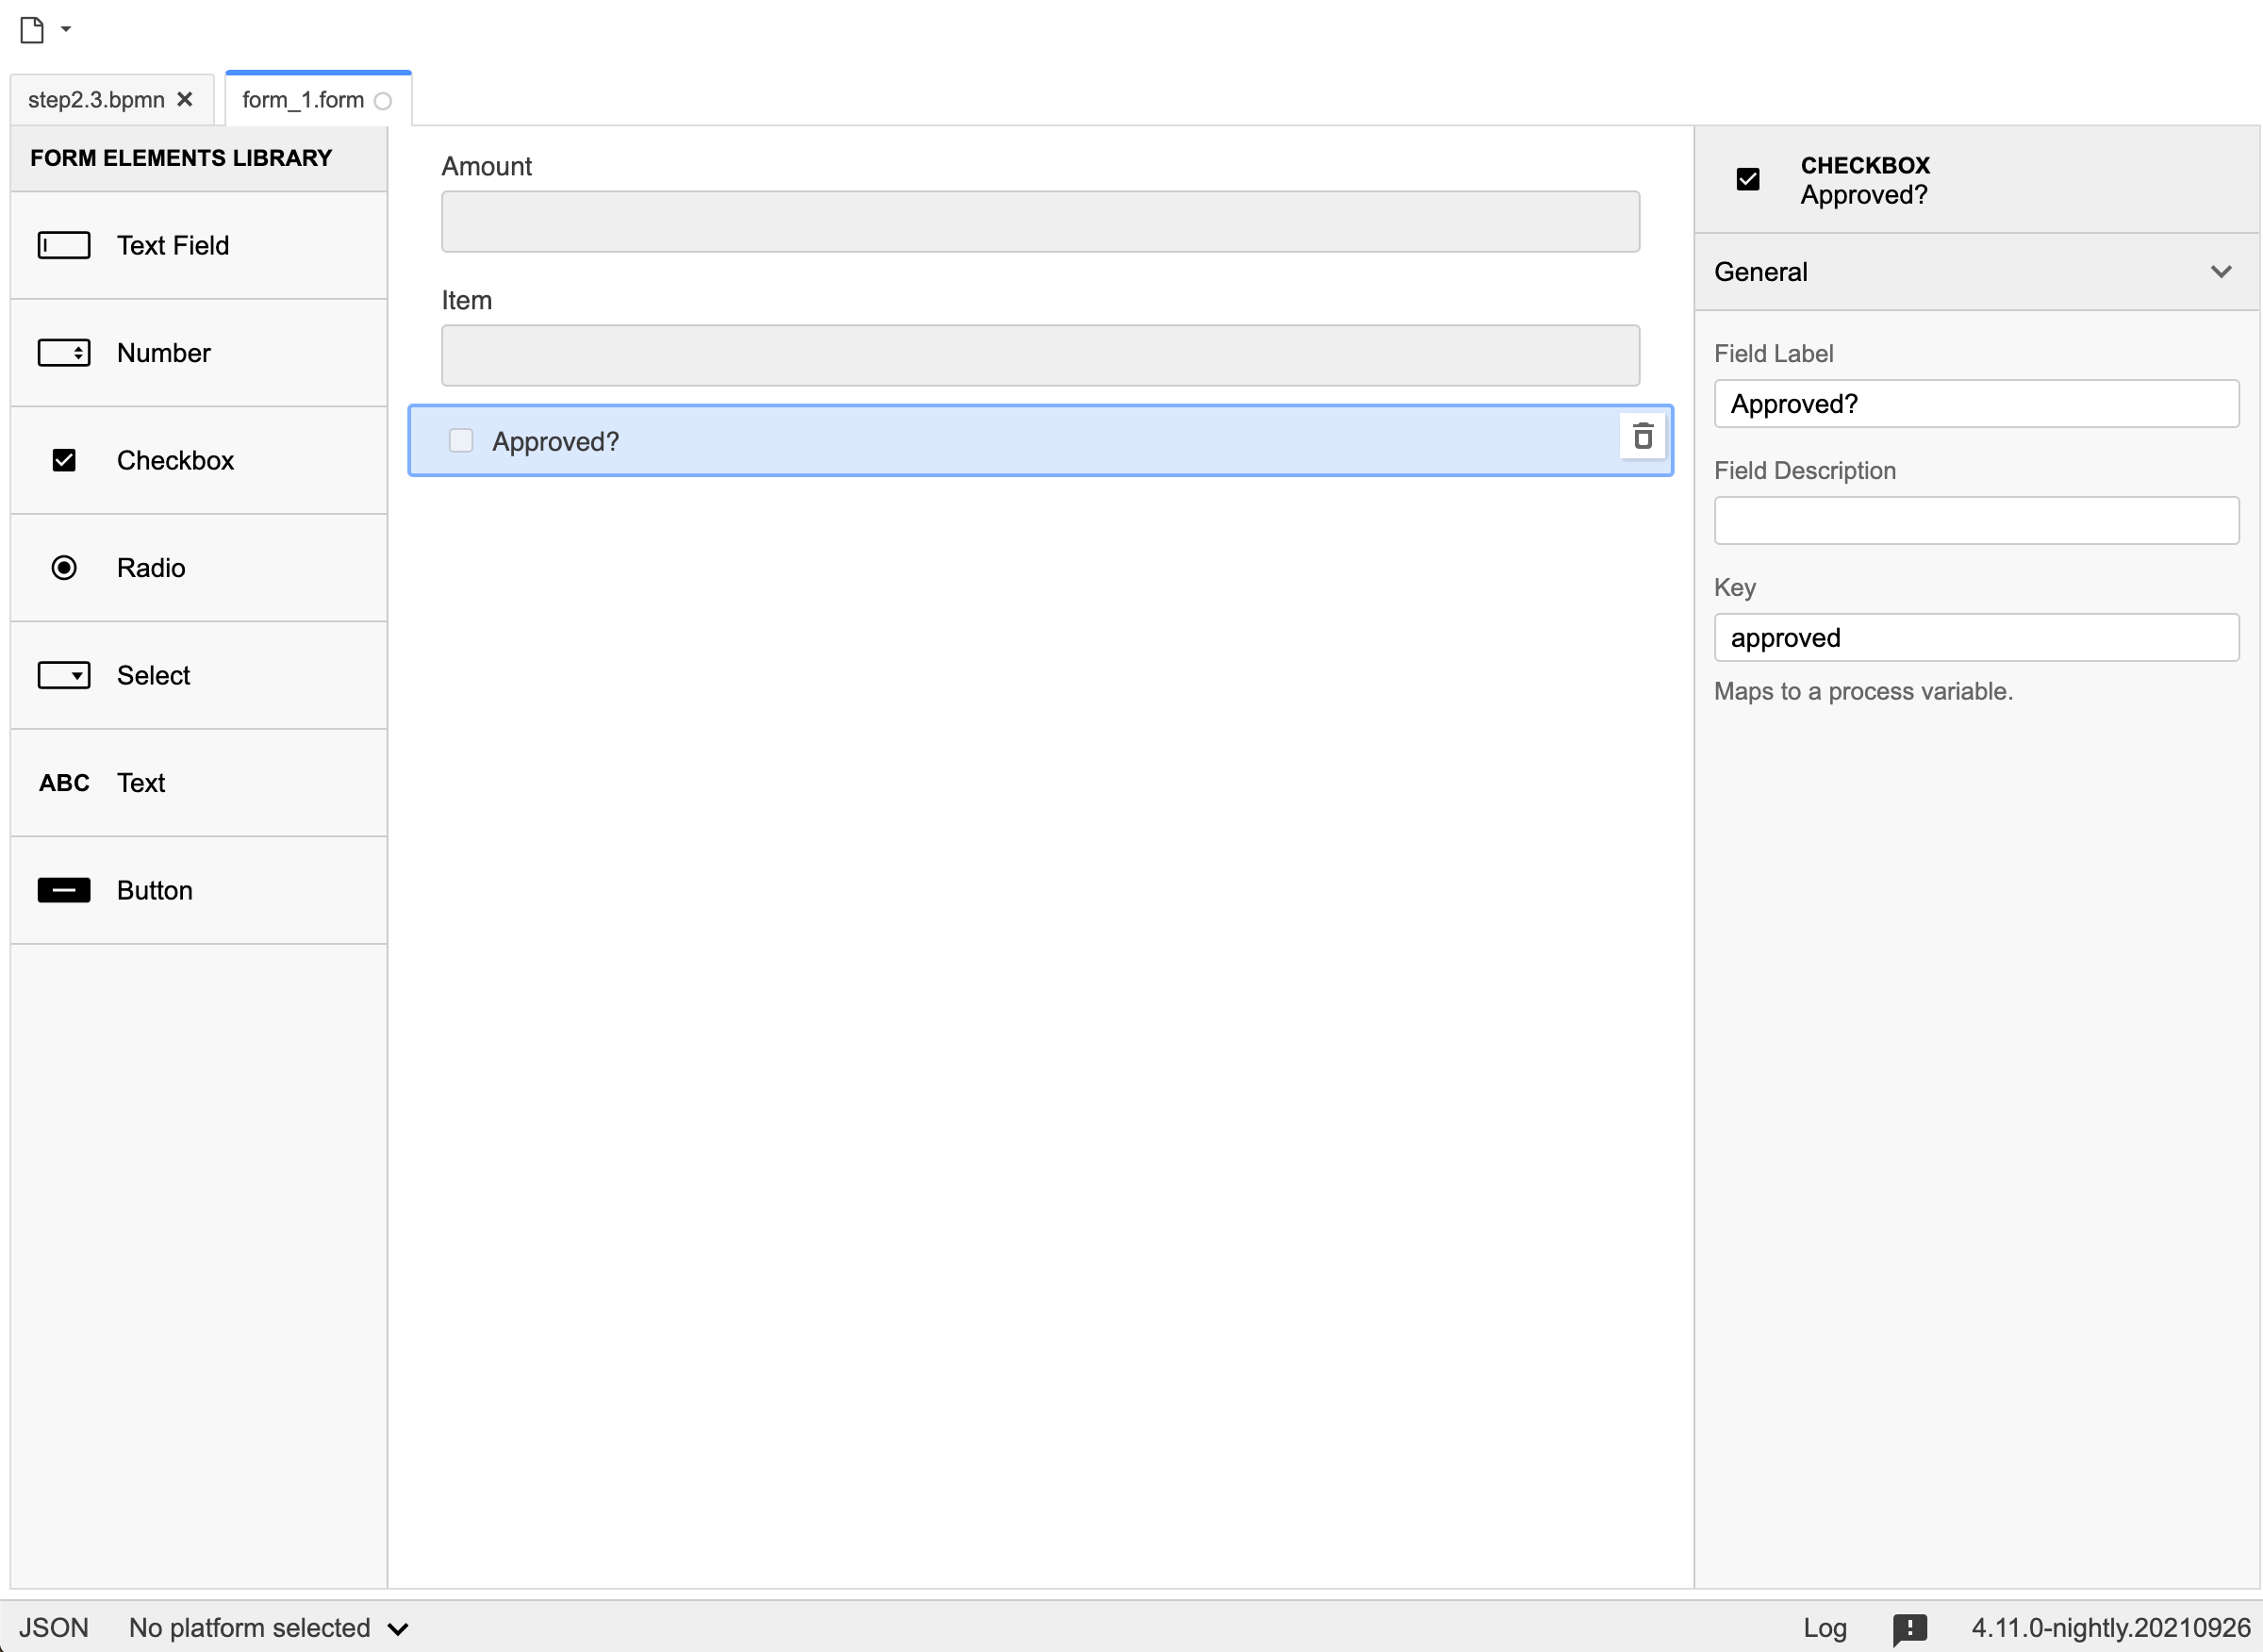
Field 3:
- Type: Checkbox
- Key: approved
- Label: Approved?
Now, select Operaton Platform as the execution platform in the lower left corner of the modeler and hit Apply.
 Finally, save the form as
 payment.form.
Deploy the Process
- Switch back to the process diagram
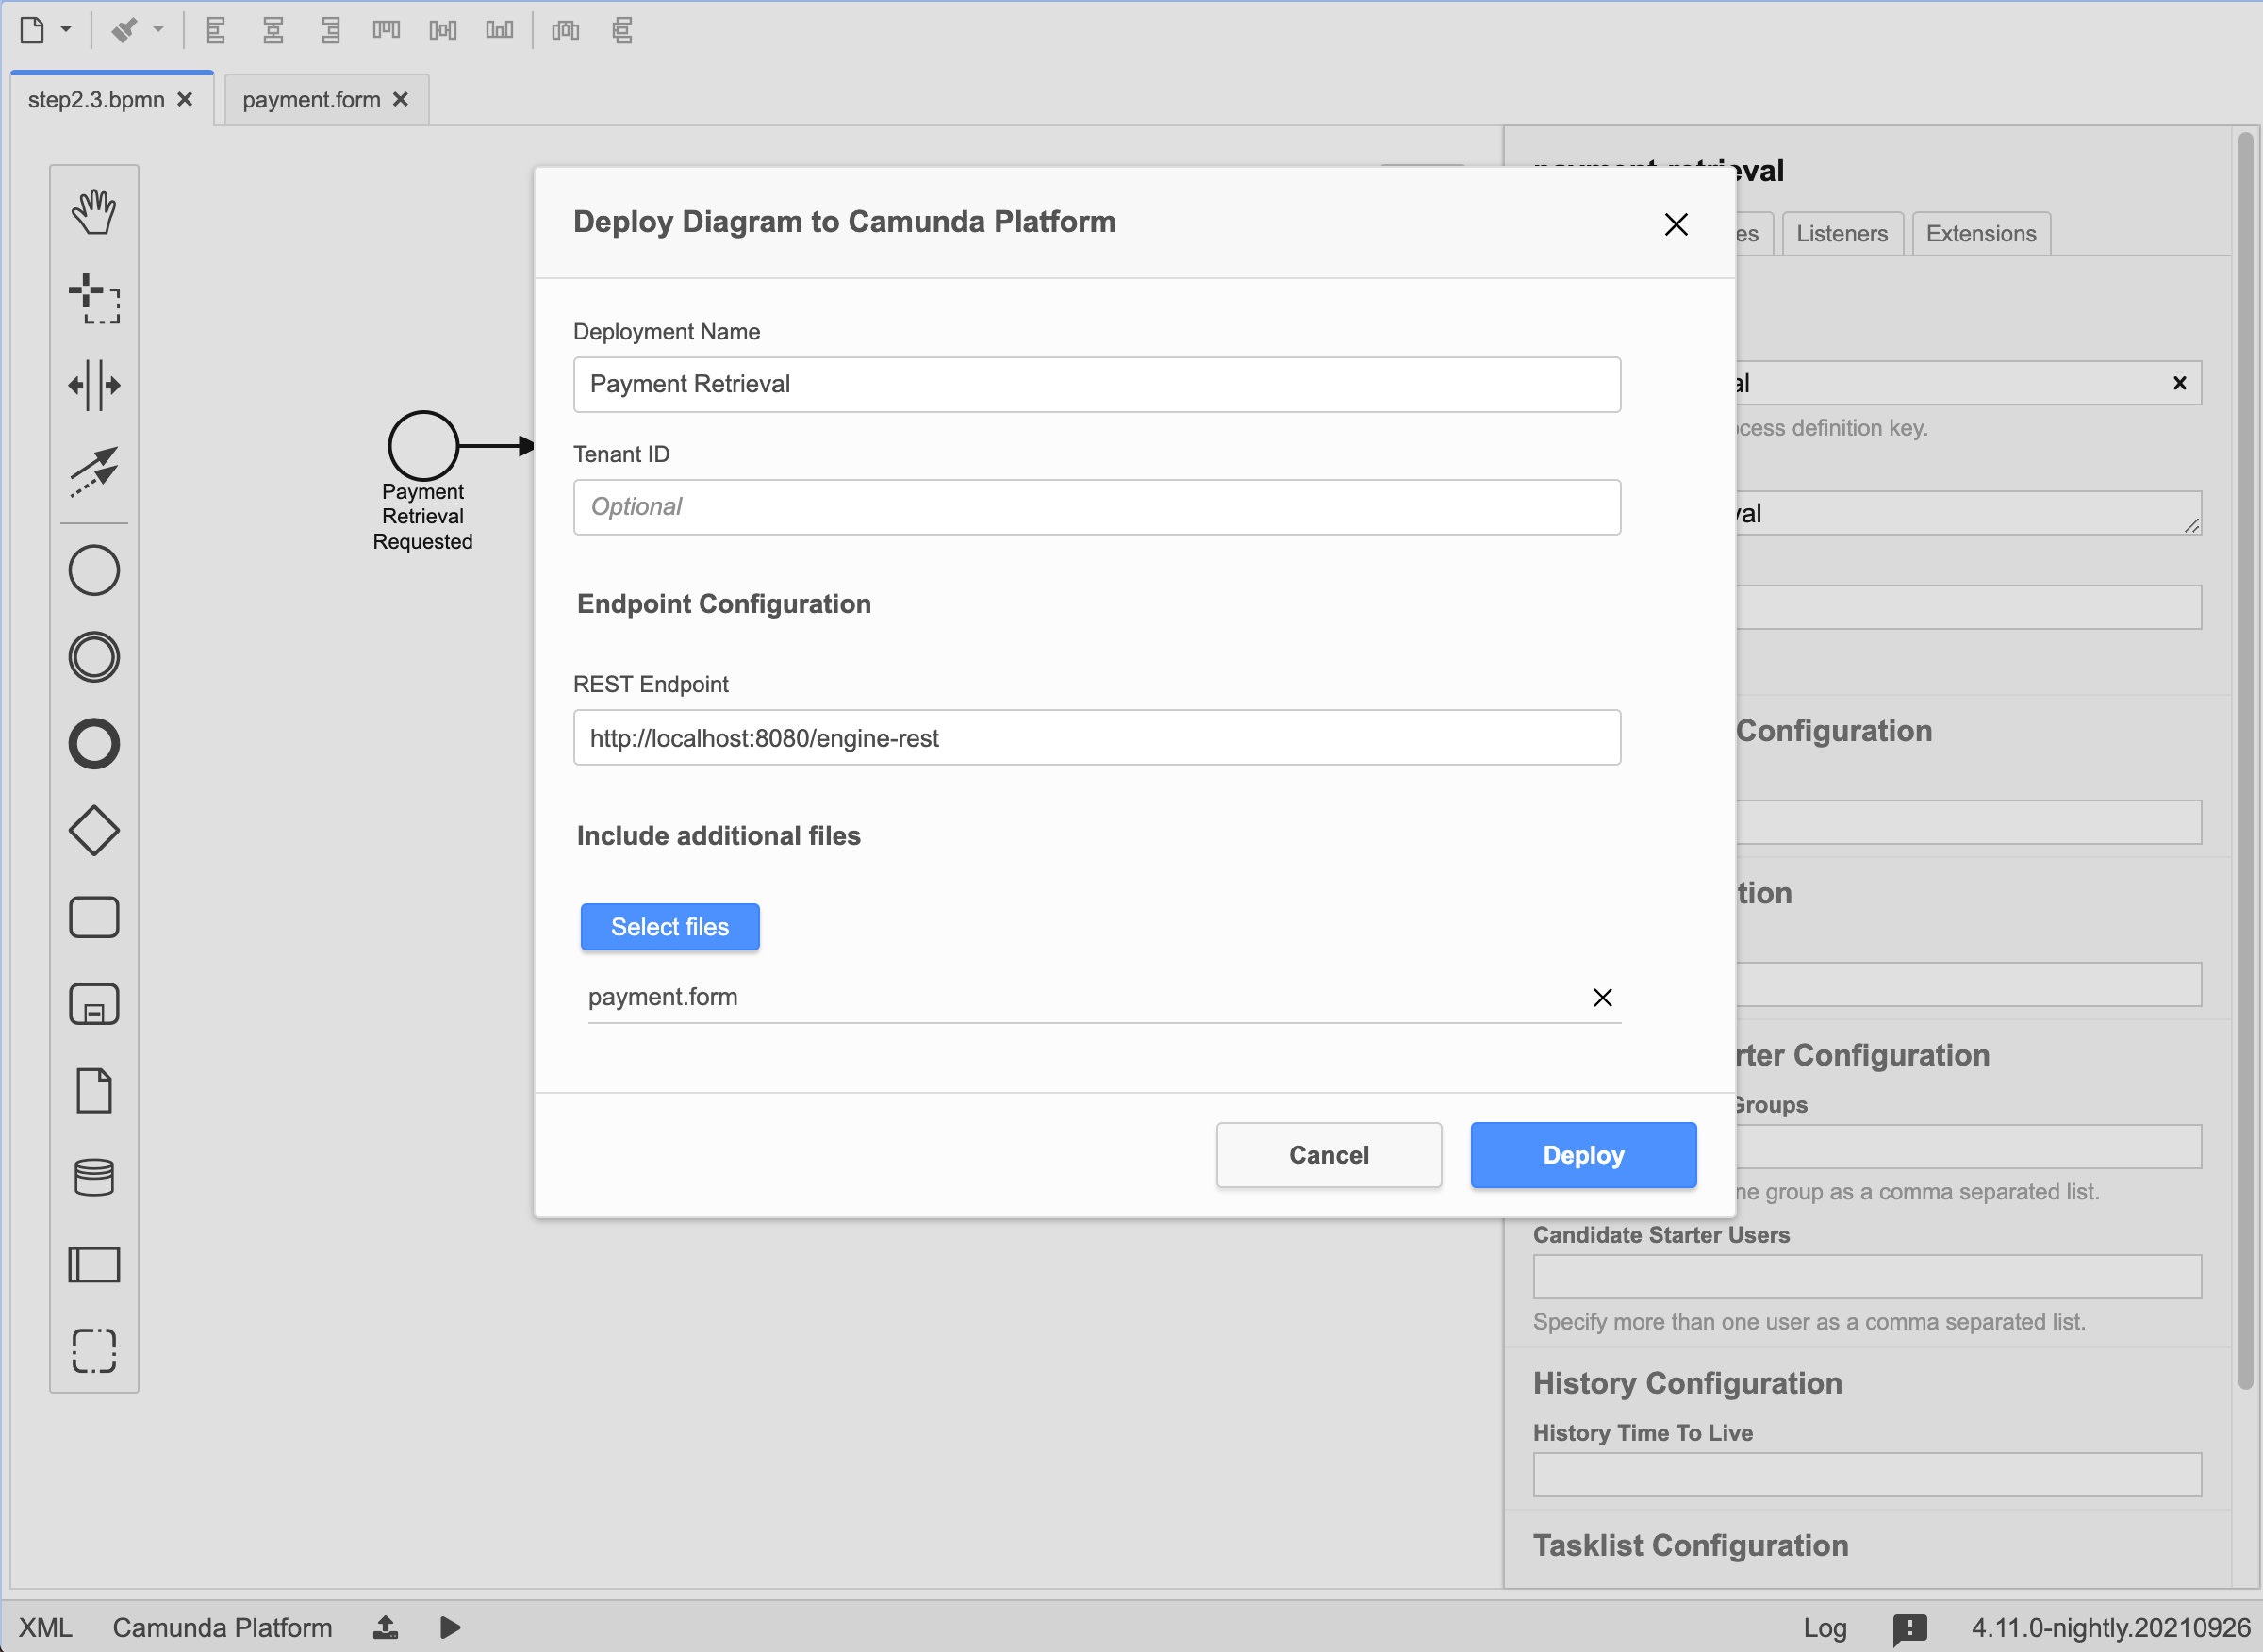
- Click the Deploy button in the Operaton Modeler
- In the deployment panel, select the
payment.formfile under include additional files - Click Deploy
Work on the Task
Go to Tasklist (http://localhost:8080/operaton/app/tasklist/) and log in with the credentials "demo / demo". Click on the Start process button to start a process instance. This opens a dialog where you can select Payment Retrieval from the list. Now you can set variables for the process instance using a generic form.
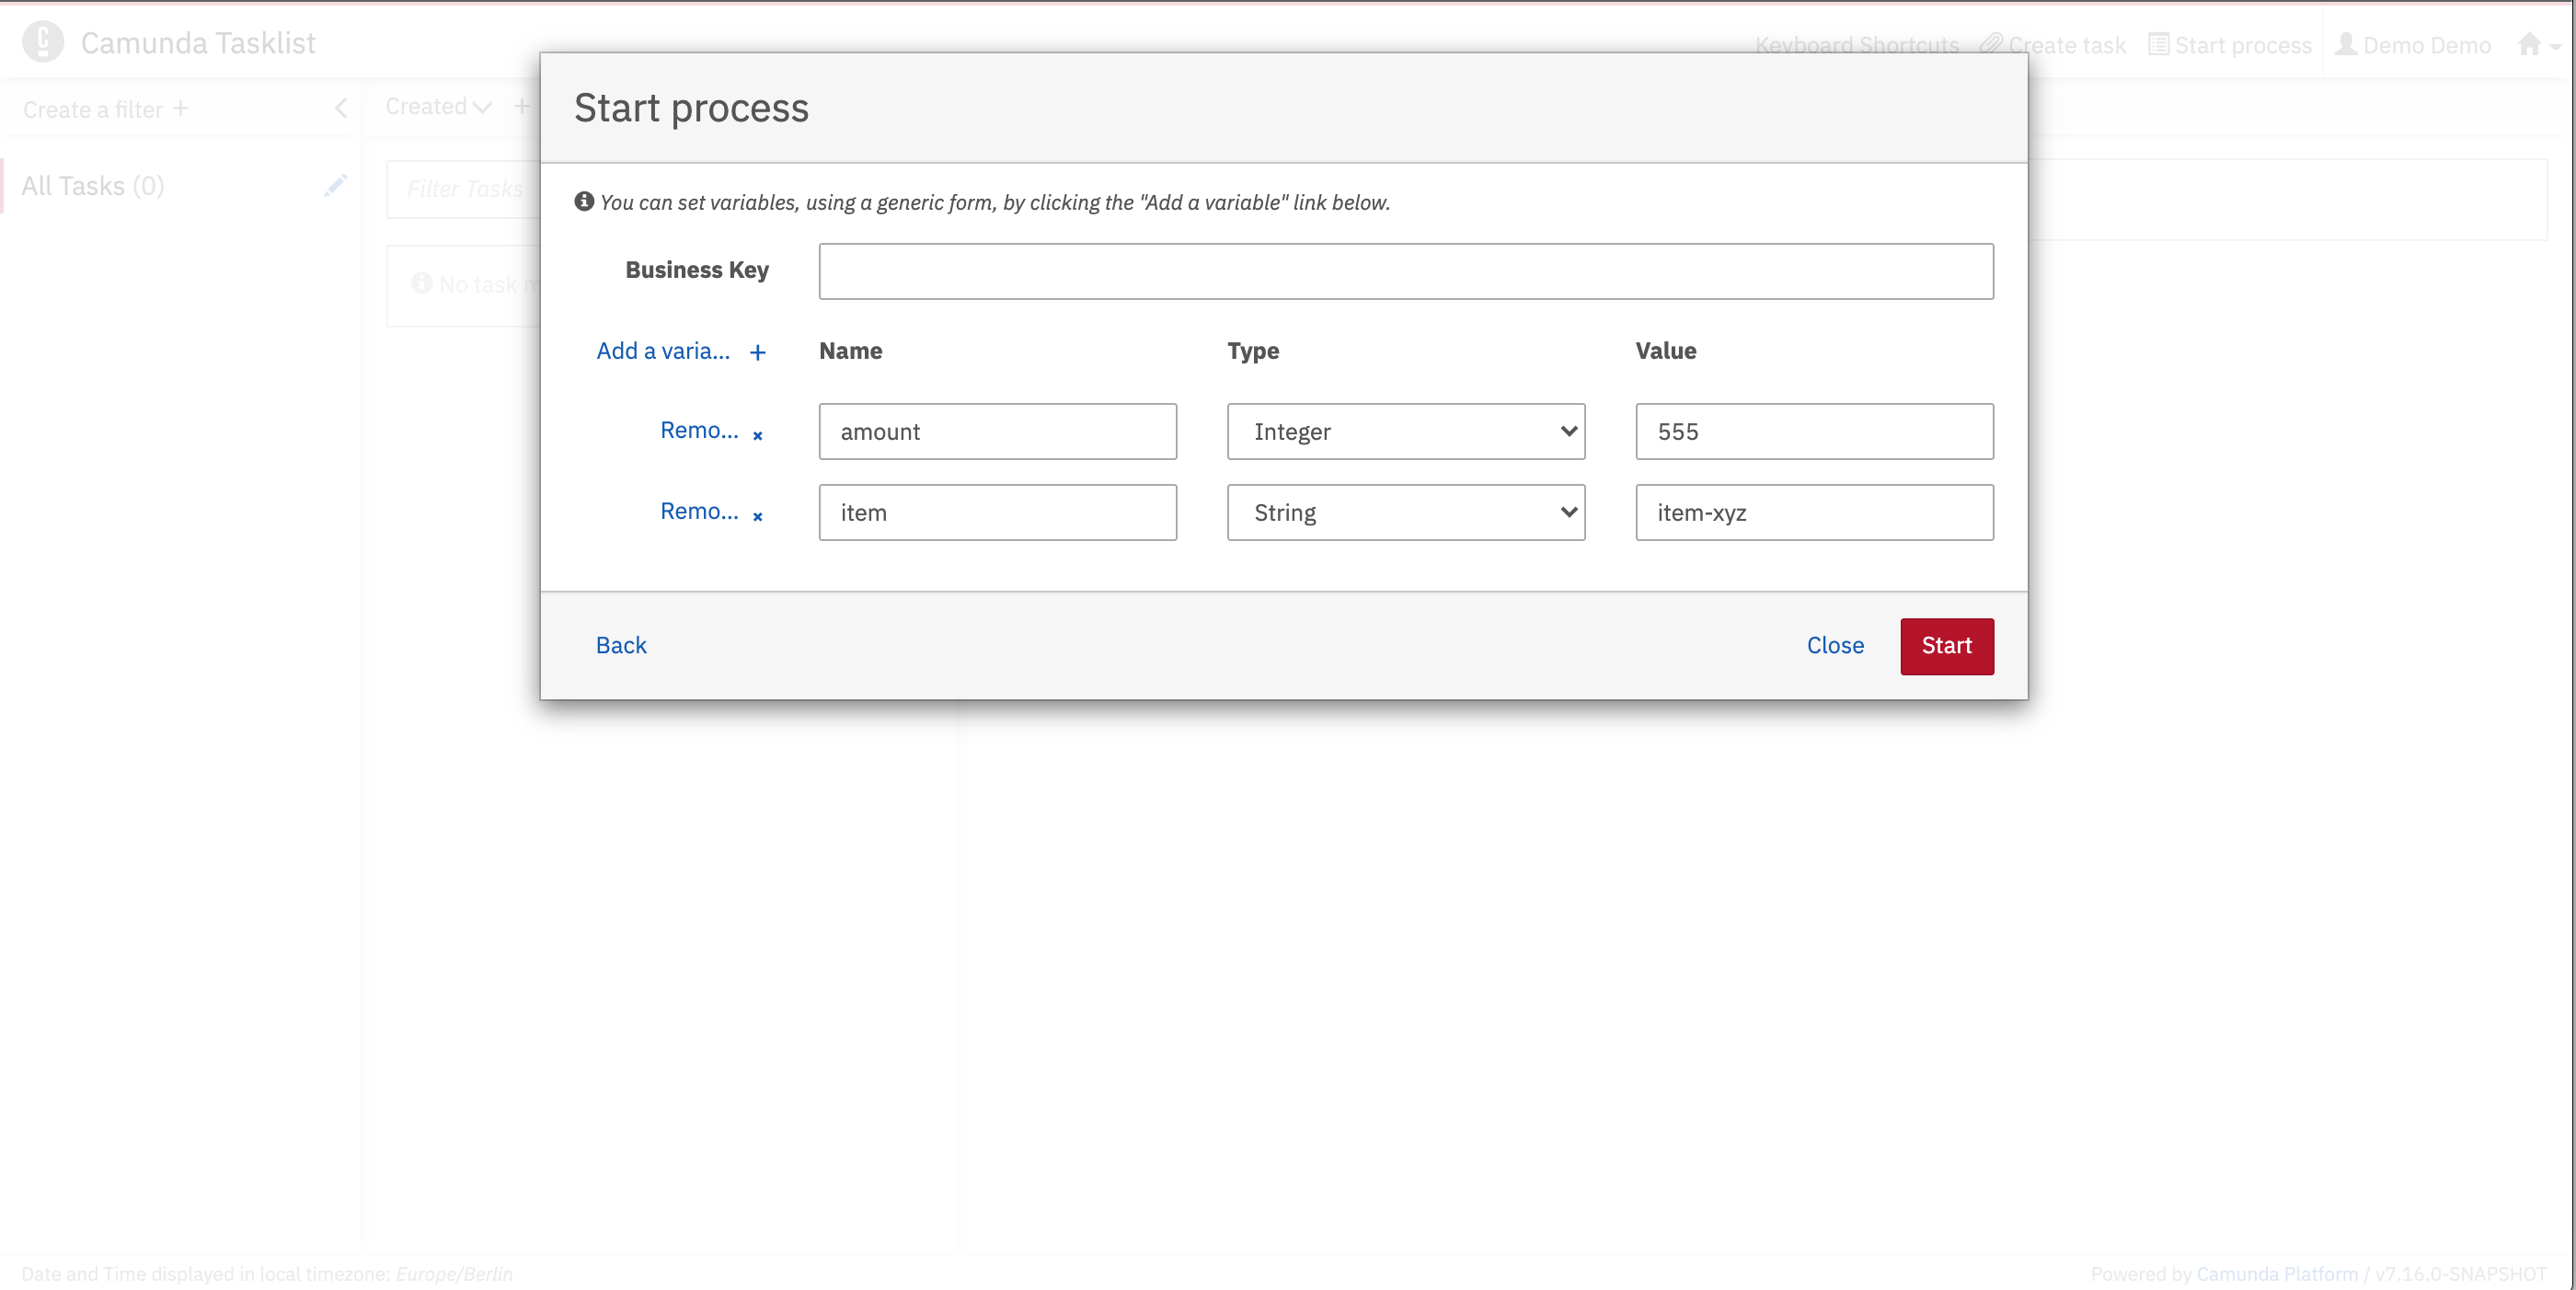
The generic form can be used whenever you have not added a dedicated form for a User Task or a Start Event. Click on the Add a variable button to create a new row. Fill in the form as shown in the screenshot. When you're done, click Start.
If you don't see any tasks in your Tasklist, you might need a filter. Add one by clicking Add a simple filter on the left.
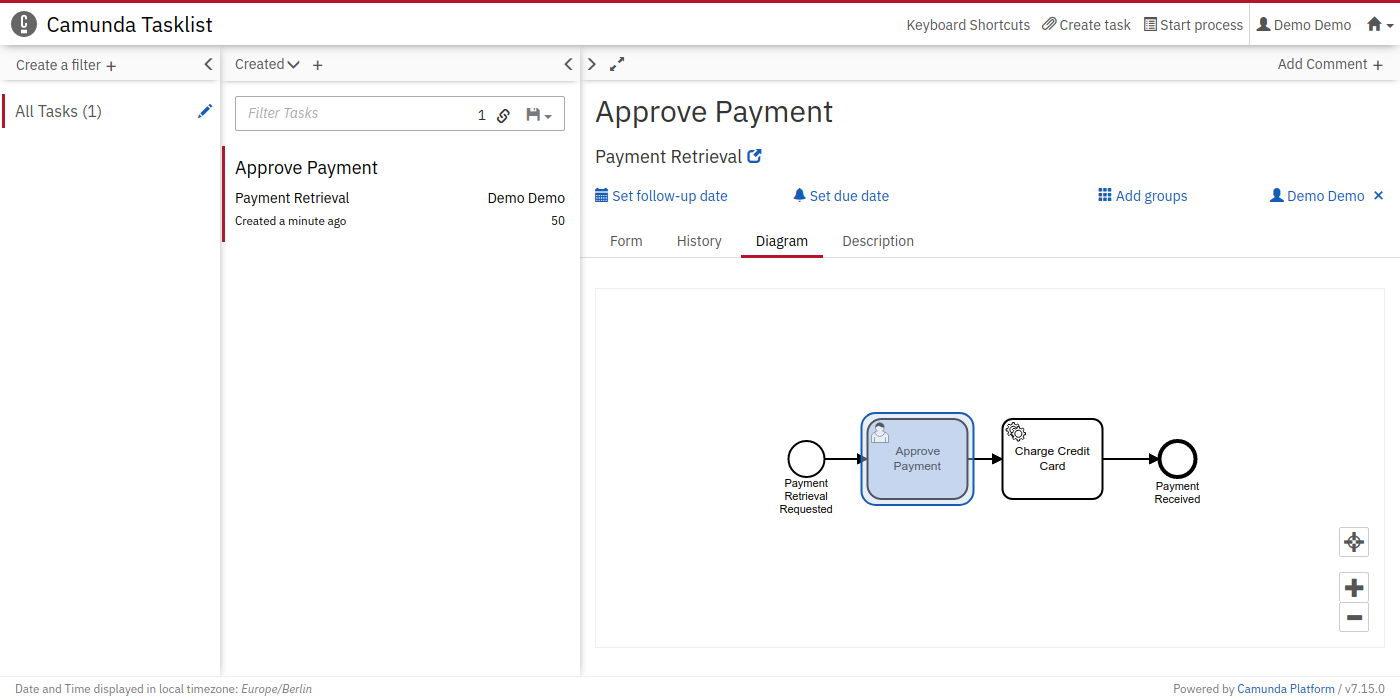
You should now see the Approve Payment task in your Tasklist. Select the task and click on the Diagram tab. This displays the process diagram highlighting the User Task that's waiting to be worked on.
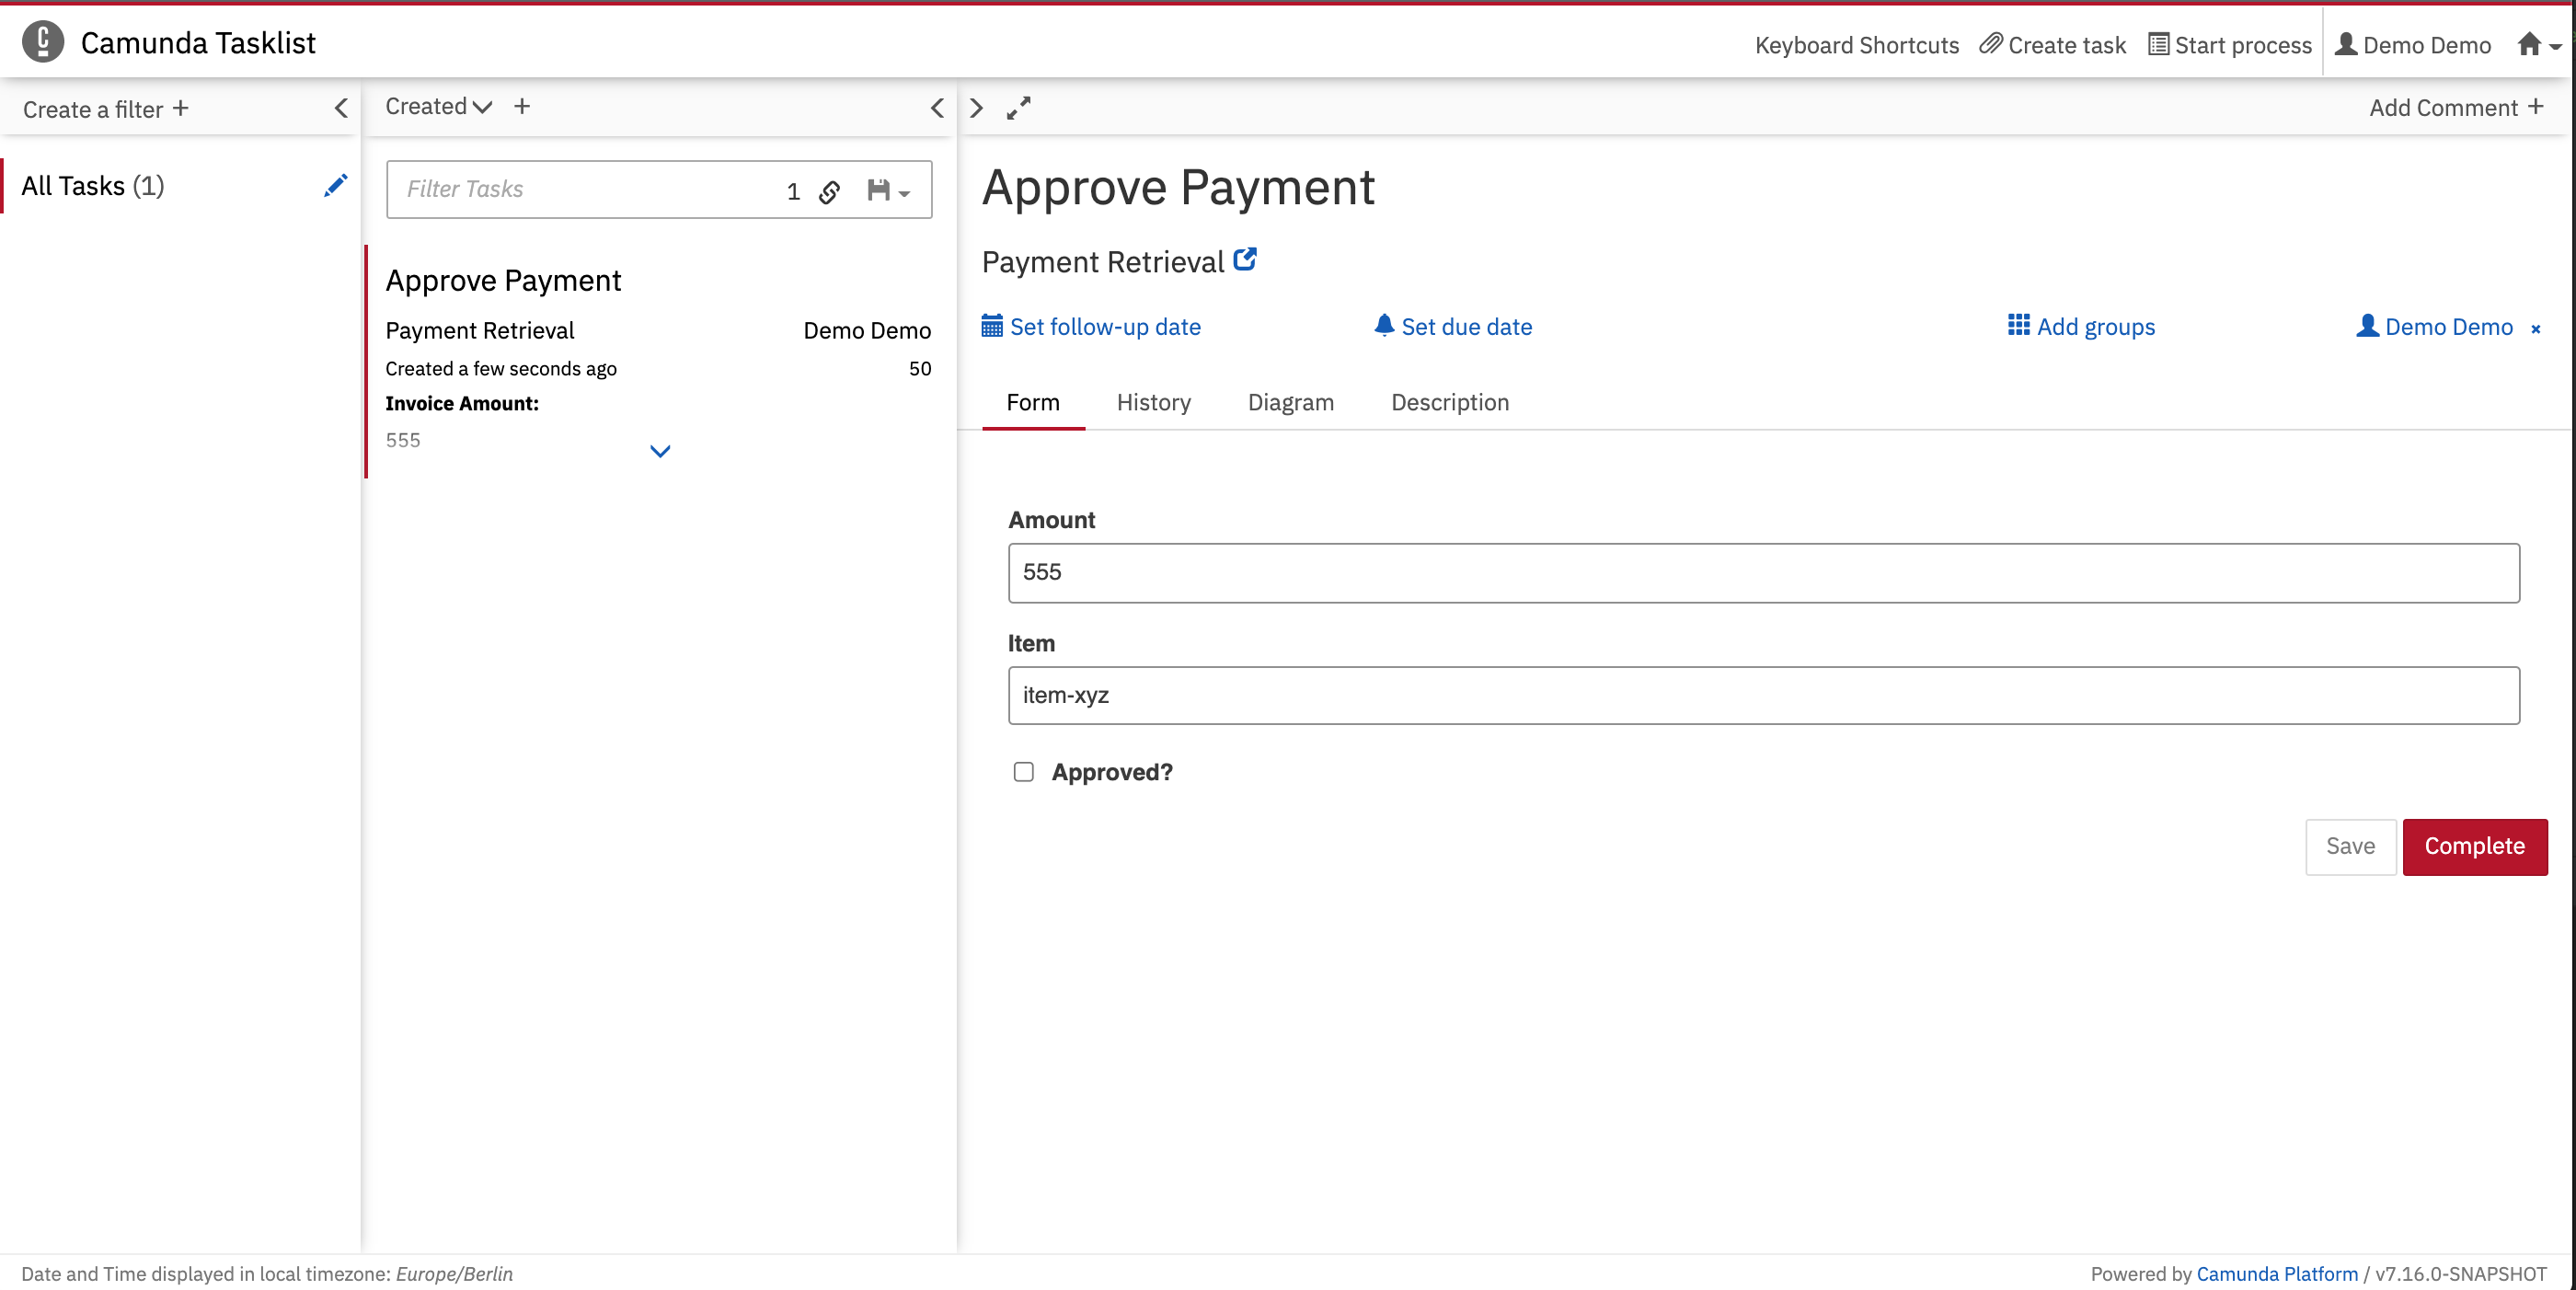
To work on the task, select the Form tab. Because we defined the variables in the Form tab in the Operaton Modeler, the Tasklist has automatically generated form fields for us.
Next, we'll make the process more dynamic and only show a User Task in certain situations. Let's have a look how you can add Gateways to your Process.