Deploy and Test the BPMN 2.0 Process
The next step consists of building, deploying and testing the process.
Build the Web Application with Maven
Select the pom.xml in the Package Explorer, perform a right-click and select Run As / Maven Install. This will generate a WAR file named loan-approval-0.1.0-SNAPSHOT.war in the target/ folder of your Maven project.
If you saved your bpmn file from the previous chapter in src/main/resources, the war file includes the bpmn file, too.
If the loan-approval-0.1.0-SNAPSHOT.war file is not visible after having performed the Maven build, you need to refresh the project (F5) in eclipse.
Deploy to Apache Tomcat
In order to deploy the process application, copy-paste the loan-approval-0.1.0-SNAPSHOT.war from your Maven project to the $OPERATON_HOME/server/apache-tomcat/webapps folder.
Check the log file of the Apache Tomcat server in the $OPERATON_HOME/server/apache-tomcat/logs folder. Select the file with the name catalina.out. Scroll to the end of the file and if you see the following log message, the deployment was successful:
INFO org.operaton.commons.logging.BaseLogger.logInfo ENGINE-07015 Detected @ProcessApplication class 'org.operaton.bpm.getstarted.loanapproval.LoanApprovalApplication' INFO org.operaton.commons.logging.BaseLogger.logInfo ENGINE-08024 Found processes.xml file at ../webapps/loan-approval-0.1.0-SNAPSHOT/WEB-INF/classes/META-INF/processes.xml INFO org.operaton.commons.logging.BaseLogger.logInfo ENGINE-08023 Deployment summary for process archive 'loan-approval':
loan-approval.bpmn
INFO org.operaton.commons.logging.BaseLogger.logInfo ENGINE-08050 Process application Loan Approval App successfully deployed
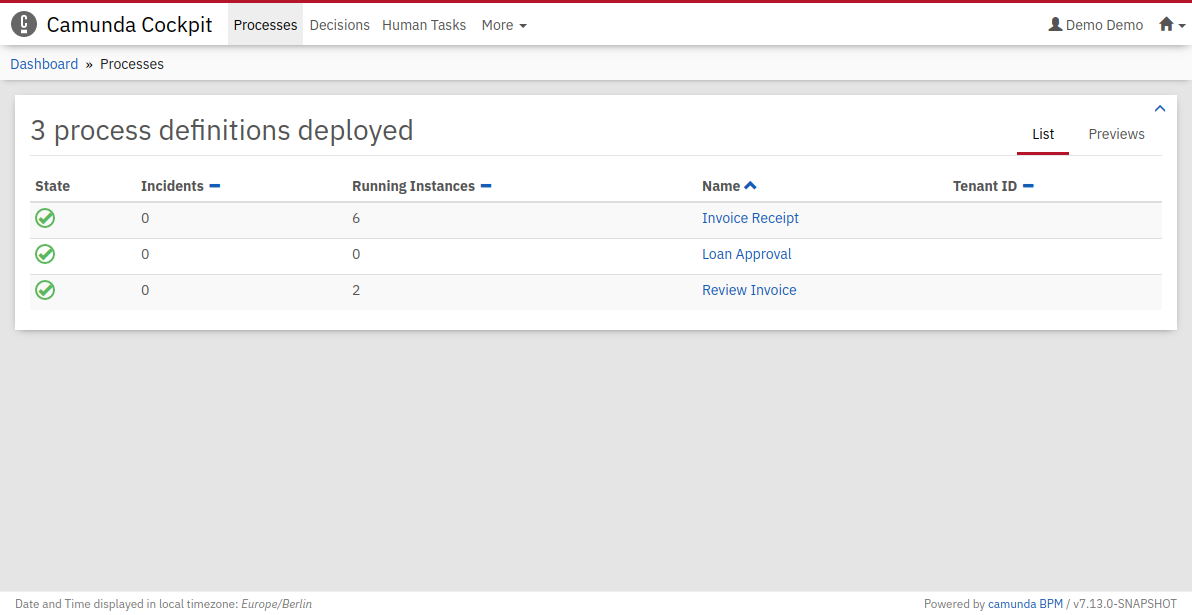
Verify the Deployment with Cockpit
Now use Cockpit to check if the process is successfully deployed. Go to http://localhost:8080/operaton/app/cockpit. Log in with demo / demo. Your process Loan Approval is visible on the dashboard.
Start a Process Instance
Next, go to Operaton Tasklist (http://localhost:8080/operaton/app/tasklist). Click on the Start process button to start a process instance. This opens a dialog where you can select Loan Approval from the list. Now you can set variables for the process instance using a generic form.
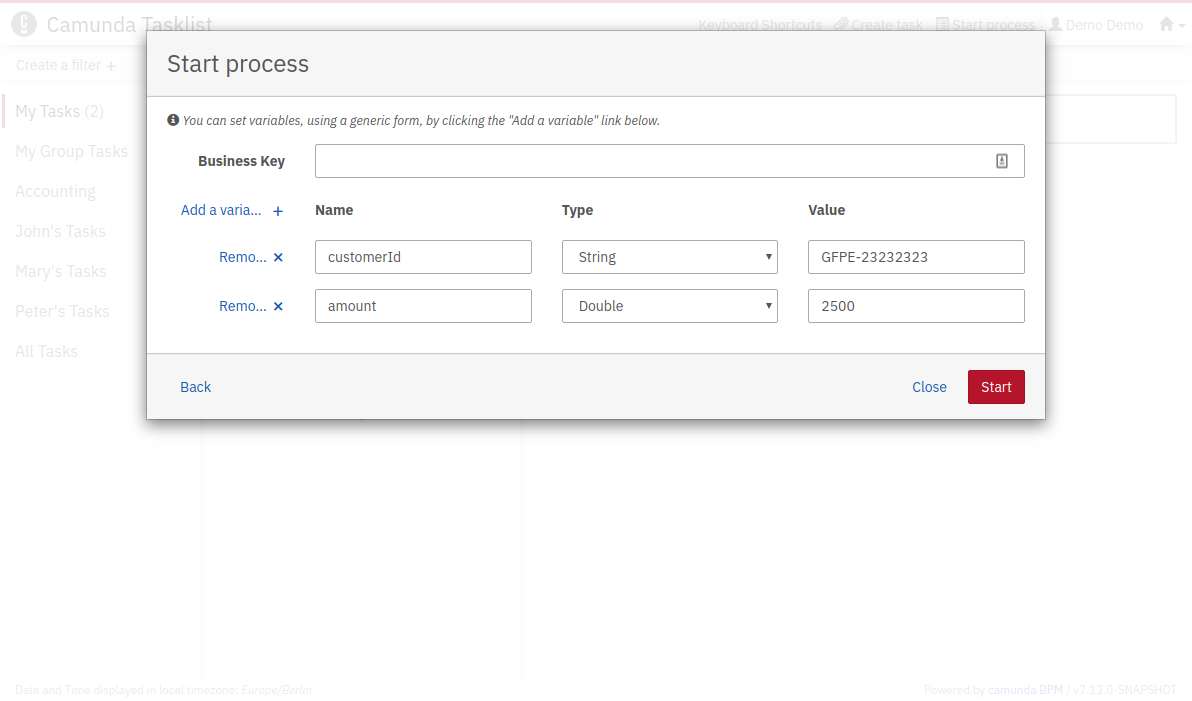
The generic form can be used whenever you have not added a dedicated form for a User Task or a Start Event. Click on the Add a variable button to get a new row. Fill in the form as shown in the screenshot. When you are done, click Start.
If you now go back to Operaton Cockpit, you see the newly created process instance that is waiting in the User Task.
Configure Process Start Authorizations
To allow the user john to see the process definition Loan Approval, you have to go to Operaton Admin (http://localhost:8080/operaton/app/admin/default/#/authorization?resource=6). Next, click on the button Create new authorization to add a new authorization on the resource process definition. Now you can give the user john all permissions on process definition approve-loan. When you are done, submit the new authorization.
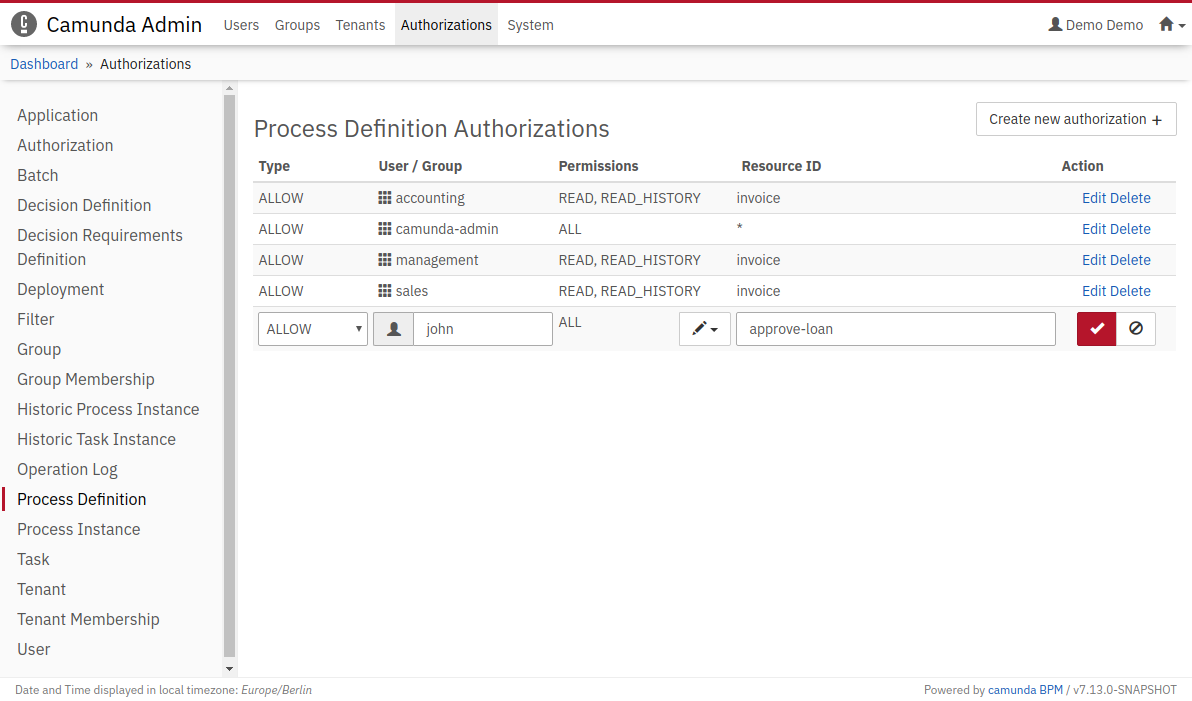
Now create a second authorization for the process instance resource. Set the permission to CREATE.
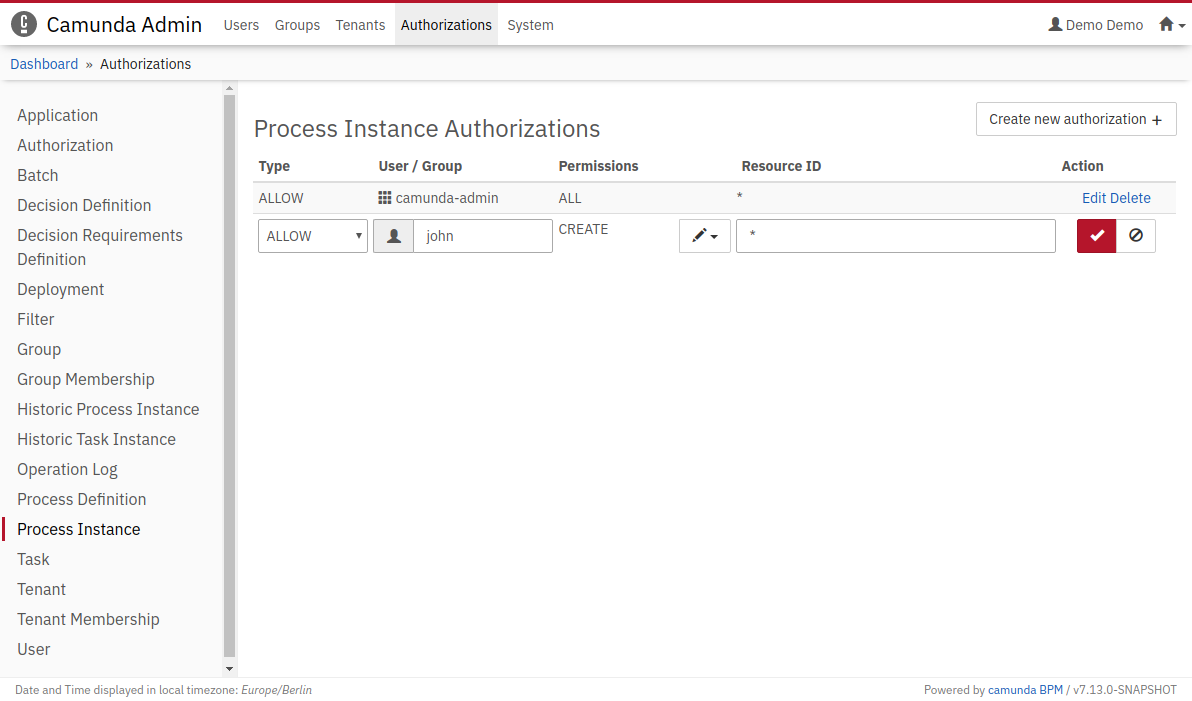
For further details about authorizations and how to manage them, please read the following sections in the user guide: Authorization Service and Authorization Management.
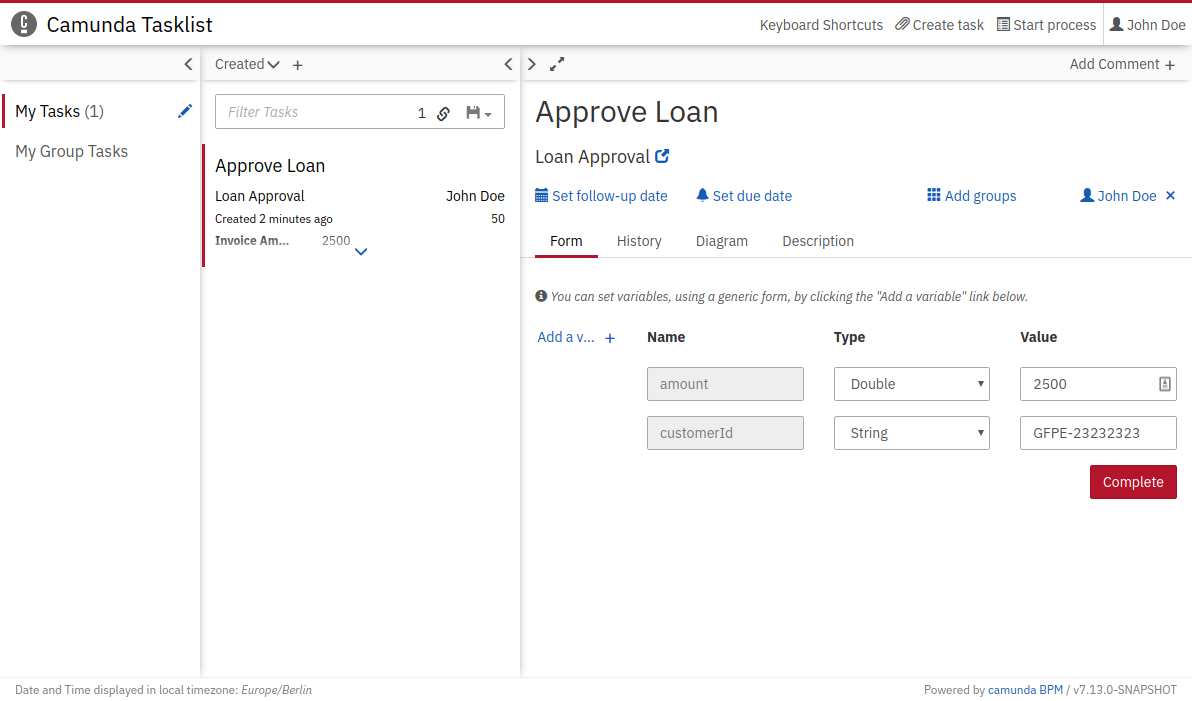
Work on the Task
Log out of Admin. Go to Tasklist (http://localhost:8080/operaton/app/tasklist) and log back in with the user credentials "john / john". Now you see the Approve Loan task in your Tasklist. Select the task and click on the Diagram tab. This displays the process diagram highlighting the User Task that is waiting for you to work on it.
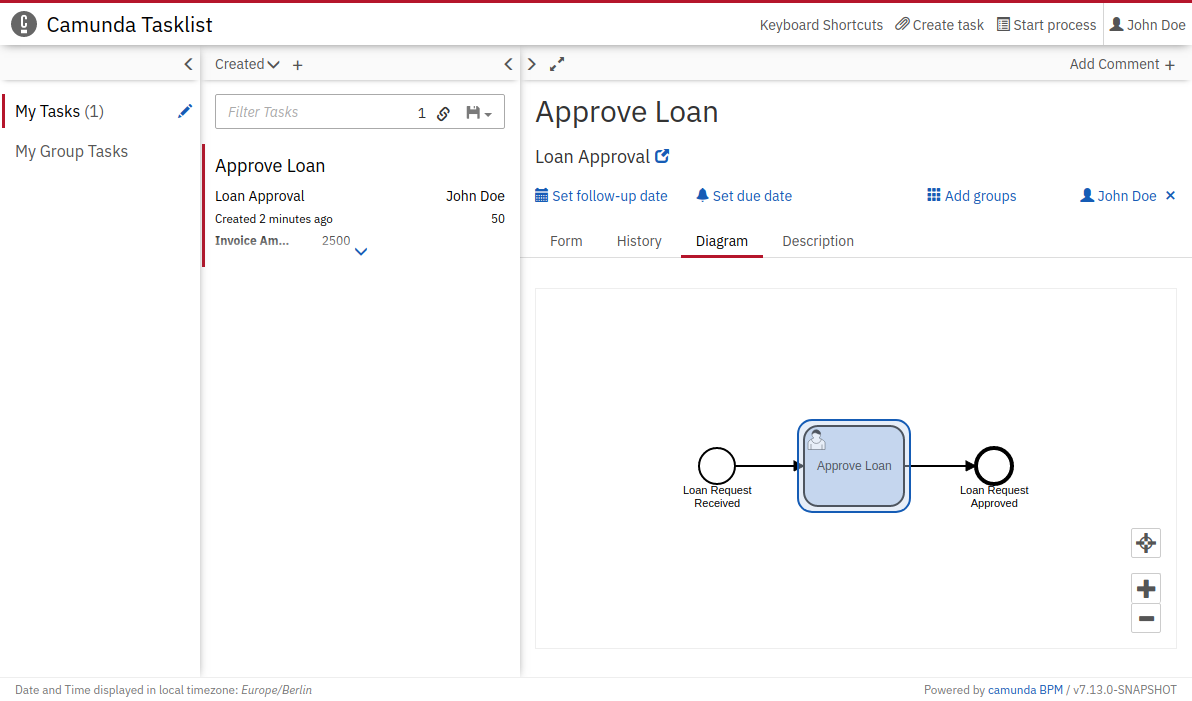
To work on the task, select the Form tab. Again, there is no task form associated with the process. Click on Load Variables. This displays the variables you entered in the first step.