Dashboard
 Tasklist Dashboard
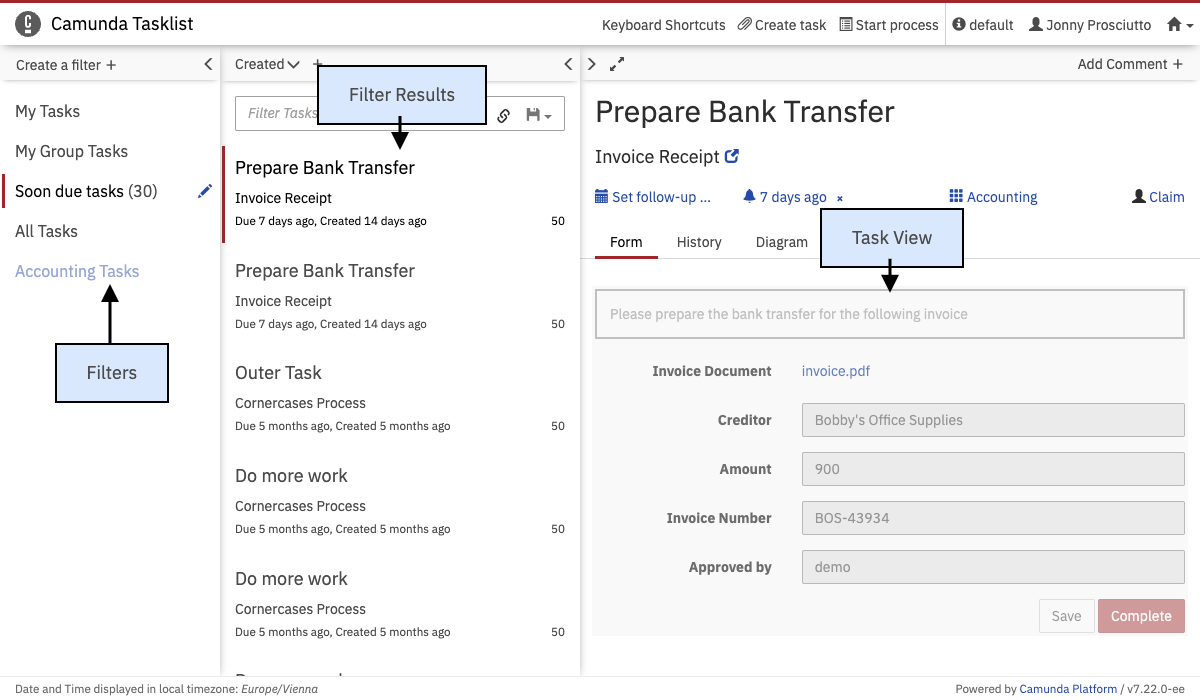
On the Tasklist dashboard, you see an overview of pending tasks. On the left side of the screen, an overview of the [filters][tasklist-filters] is displayed. On the upper-right side of the screen, you can set a follow-up or due date, claim, unclaim and reassign tasks, and add comments. Below that section, the embedded form is displayed (please note that external task forms cannot be displayed here), you can switch to the task history, you can see the diagram view, or you can view the description of the user task.
Toggle view
 Tasklist View
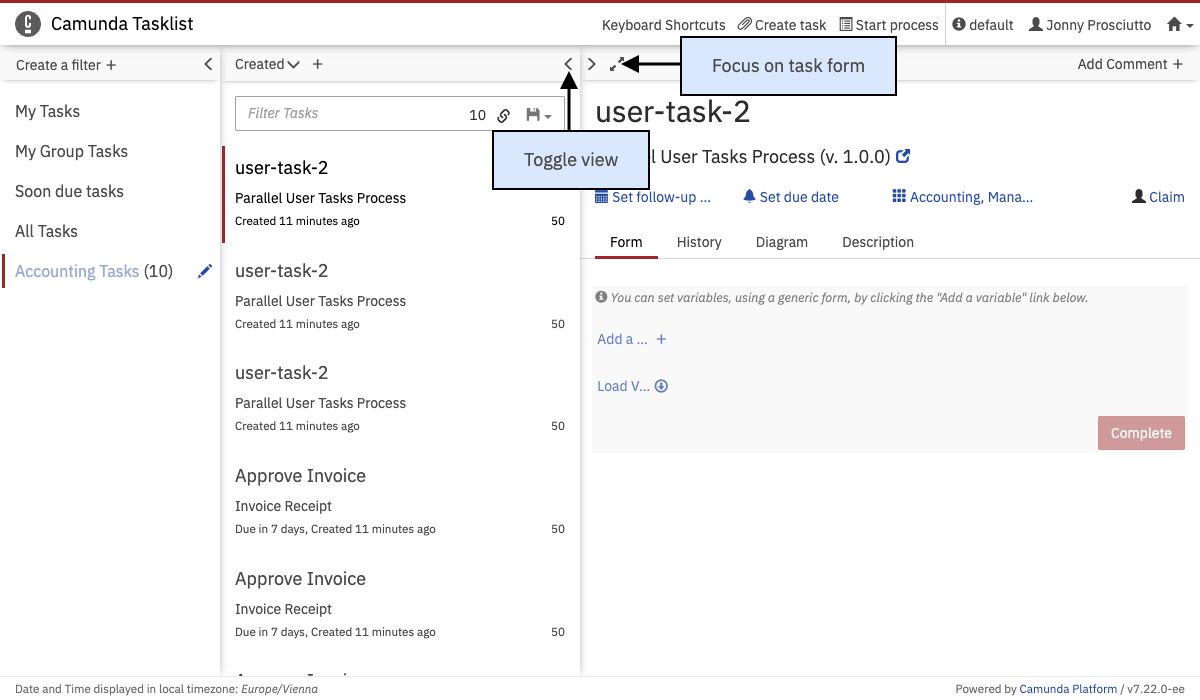
Tasklist lets you toggle the view options on the dashboard. You can focus on the [filters][tasklist-filters], the [filter results][filter-results], the [task view][task-view], or display the full dashboard. To do so, select the matching toggle view button. At any time, you can set full focus on the task view by selecting the expand button.
Start a process
 Start Process
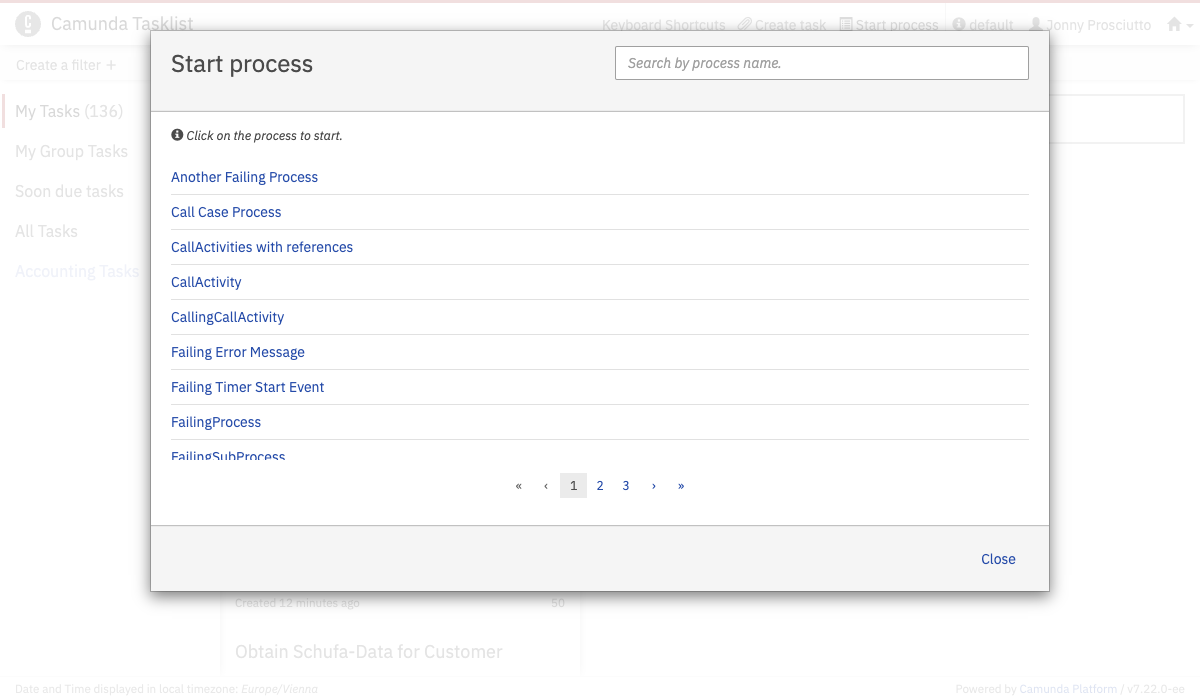
To start a process instance via Tasklist, click Start process in the header menu and select a process from the displayed list of process definitions. If no process definitions are listed here, please verify that your process application is deployed correctly.
Depending on whether you have defined a start form for your process, Tasklist displays it now. Otherwise, you get a notification that no form has been defined for starting the process. In this case, a generic start form is displayed and Tasklist offers the option of adding variables to the process instance.
Create a standalone task
 Standalone Tasks
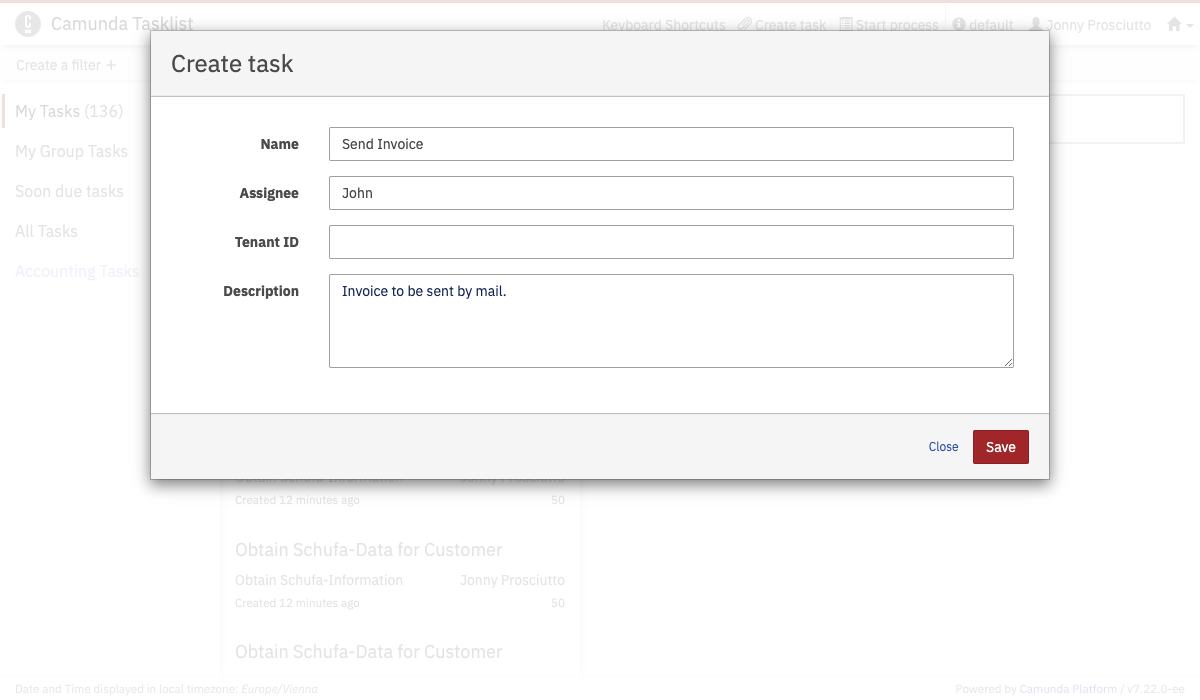
Tasklist lets you create standalone tasks. To do so, click the Create task button. In the screen that appears, you can define the task name, the assignee, and a description. Once you click Save, the task is created.
Now the standalone task becomes visible in the filter results and can be handled. Variables can be added and the task can be completed. Once the task has been completed, the data is flushed to the database and the task is no longer visible in Tasklist.
Filter results
 Filter Results
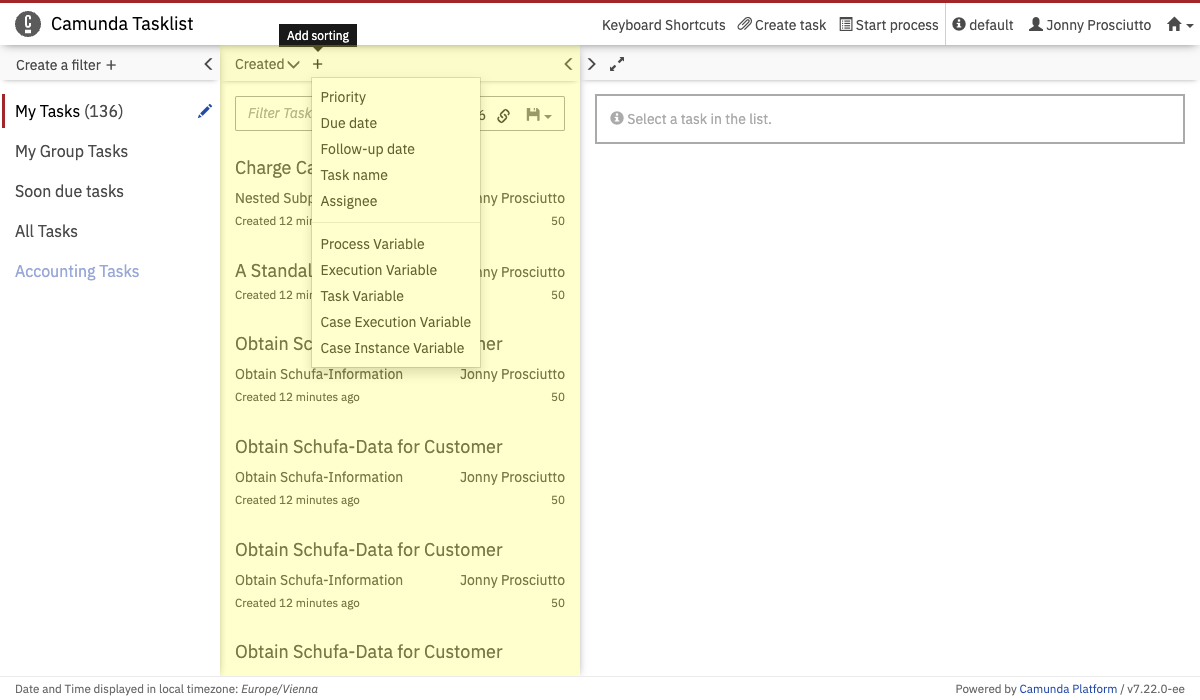
Here you can see an overview of all tasks for the selected [filter][tasklist-filters]. The filter with the lowest priority is displayed first. After selecting the appropriate filter, you will see an overview of all tasks, sorted by a specified criterion (by default, tasks are sorted by creation date). You can change the sorting of the tasks by clicking the name of the sorting property. You can toggle between ascending and descending order.
You can sort by more than one property by adding additional properties with the plus button. The sorting is performed in a hierarchical manner (i.e., first by the property displayed first, then by the second, etc). You can also sort by the value of variables, which allows for use cases like sorting invoices by the value of their amount.
To start working on a task, select it.
Search for tasks
 Task Search
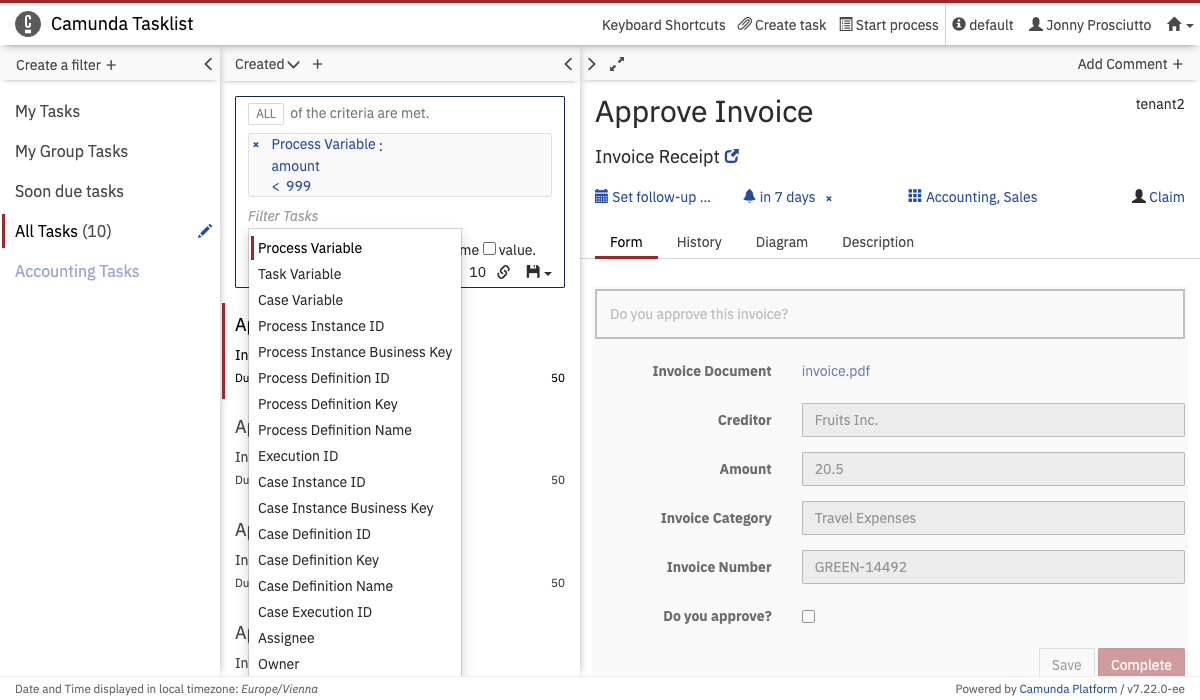
Above the filter results, you have the option of searching for user tasks within the selected filter results. To do so, click in the search box and select the parameters to search for. You can also begin typing to find the required parameter faster. Depending on the selected property, you have to specify the value of the property. Some properties also allow operators other than equals, e.g., 'like', which lets you search for a task where the entered value is a substring of the property value. The 'in' operator allows you to provide a comma-separated list of possible values.
If you are searching for variables, you also have to enter the variable name you want to search for. If the filter you have selected has defined labels for variables, you can select the variable label as the variable name. Otherwise (if there is no label definition for a variable), you have to enter the variable name to search for it. If you change the filter selection, the search will be performed on the selected filter and the results will be updated accordingly.
If you are searching for a variable of type string, which has a numeric, boolean or null value, you have to wrap the value in single quotes (e.g., '93288' or 'NULL').
Furthermore, you can copy a link to the current search query to your clipboard by clicking the button and you can save search queries to your local browser storage by clicking the button and entering a name in the drop-down menu that appears. You can then retrieve the search query by clicking the button and selecting the chosen name in the drop-down menu.
Case insensitive search
 Task Search
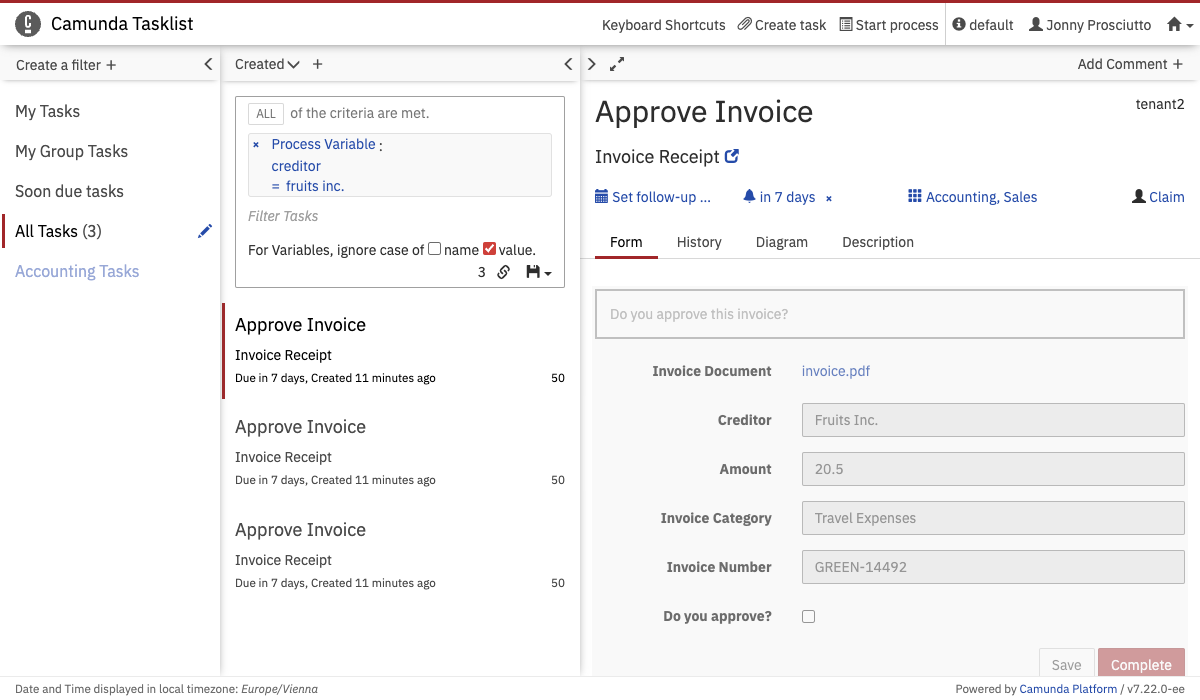
Sometimes it is not relevant for your search whether the value is capitalized or not. For search queries for process, task, and case variables, you can configure whether the search should be performed case-sensitive or case-insensitive. A case-insensitive search for 'Fruits Inc.' will also return matches for values like 'fruits inc.' or 'FRUITS Inc.'.
When your search contains one of the variables mentioned above, two checkboxes appear. You can choose the case handling for the variable name and variable value independently. The option applies to all variable queries within the same search.
IN operator
 IN Operator
Tasklist provides IN operator support for the following query criteria:
- Tenant ID
- Process instance ID
By default, the criteria defined in the search are linked together with a logical AND (conjunctive normal form).
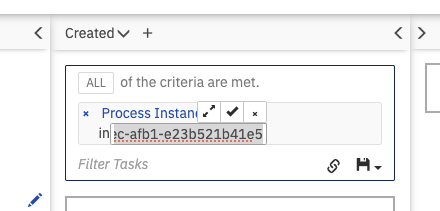
Occasionally, you may search for multiple query criterion values. The IN operator allows searching for multiple values where any of the values match.
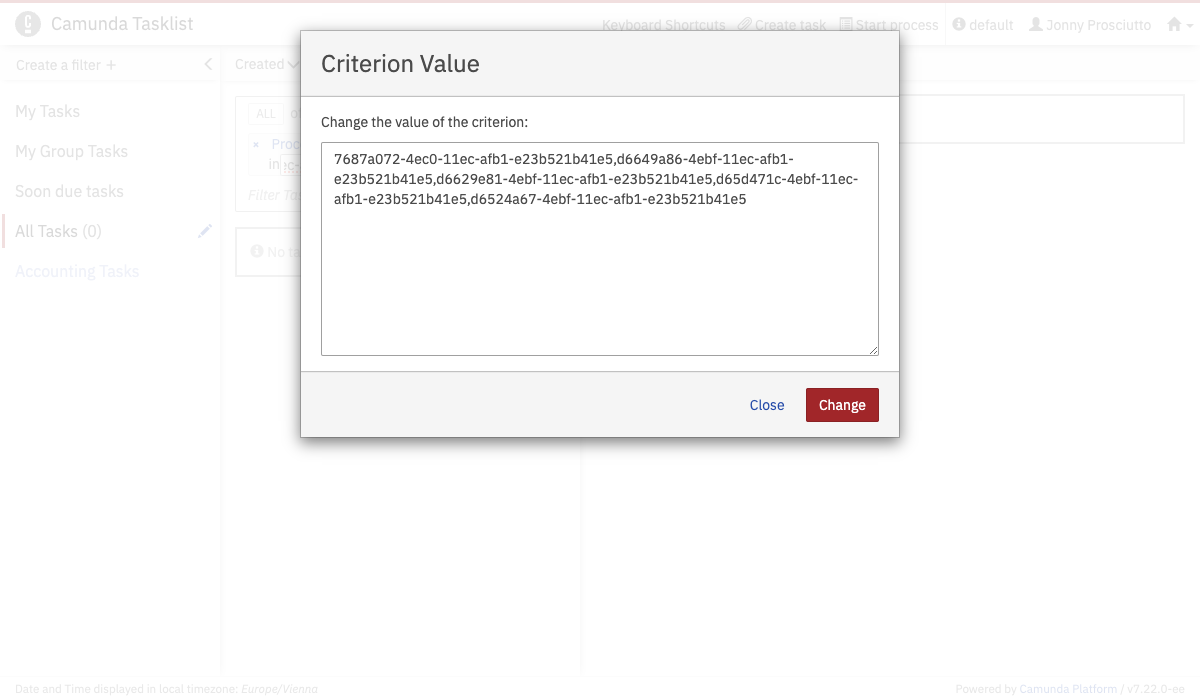
To use the IN operator, select a query criterion that supports the IN operator, and provide the values as a comma-separated list. To adjust the comma-separated list of values,
start editing by clicking the value. You can expand the value in a modal dialog for easier editing by clicking the button.
 IN Operator Modal
Task view
 Task Detail View
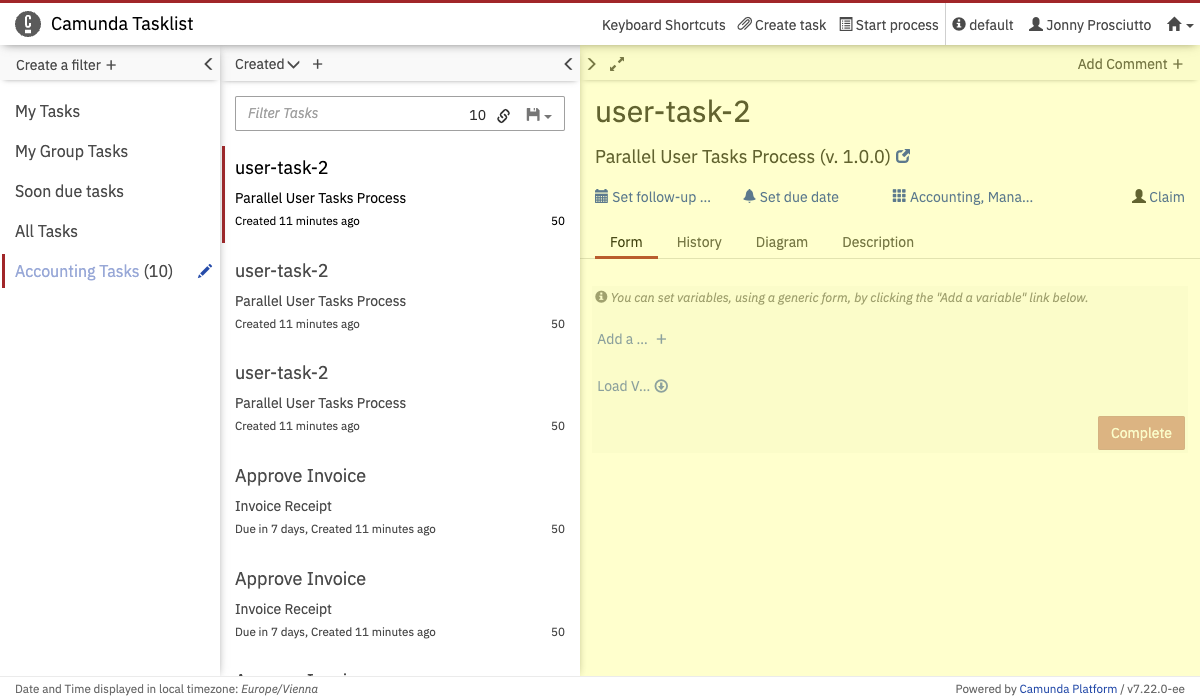
In the right section of the dashboard, you can see the task view. Here you can work on tasks and perform the following operational actions.
Set due dates and follow-up dates
In the upper section of the task view, you can set a due date and follow-up date for the selected task. A due date can be set to determine when the task needs to be completed and a follow-up date can be set as a reminder or for monitoring purposes.
Claim, unclaim, and reassign tasks
Within the task view, you can claim, unclaim and reassign tasks. To claim a task, select Claim. Unclaim a task by selecting the remove button next to the assigned username. To reassign a task to a different user, click the username and enter the username of the user you want to assign the task to. You can also assign tasks to user groups by clicking Add Groups.
Comments
In Tasklist, you can add and view comments on specific tasks. After selecting a task from the [filter results][filter-results], click Add Comment at the top of the [task view section][task-view] to add a comment to the selected task. The comments of a task can be viewed in the task history.
Task Detail Tabs
 Detail Tabs
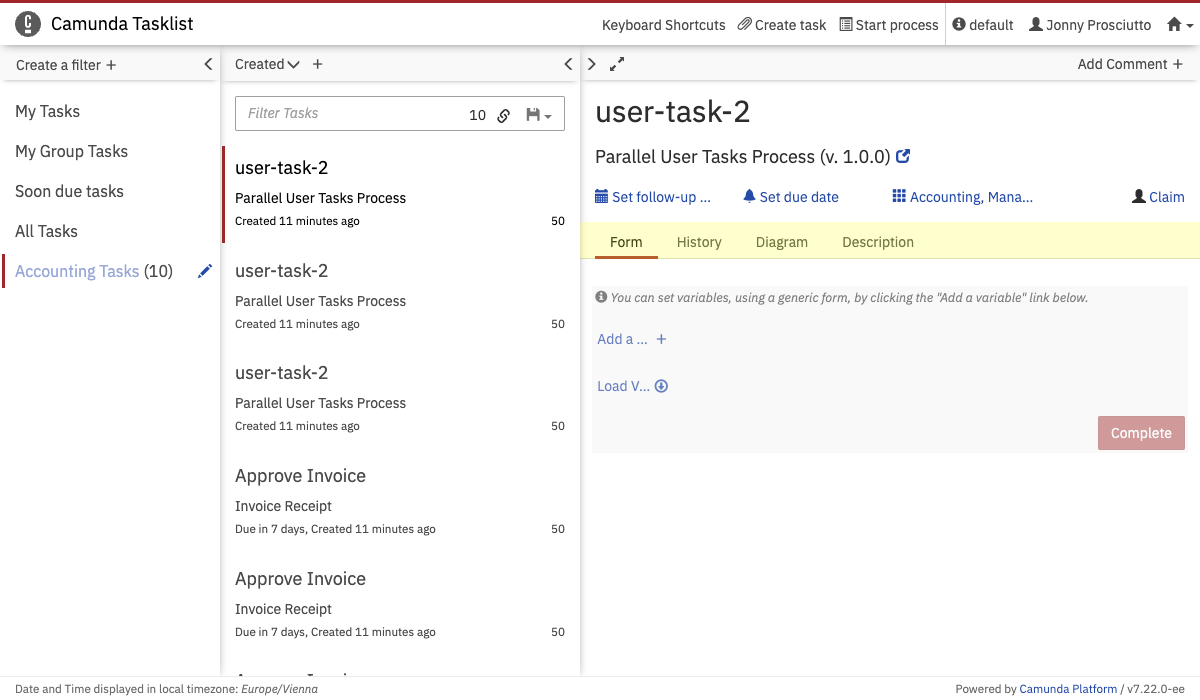
In the lower section of the task view, several tabs display both the task form itself and additional information related to this user task.
- Task form view - The Form tab, which is selected by default, displays the task form (provided that the task form is an embedded, generated or generic task form). Here you can work on and complete the task.
- Task history - The History tab displays the history of this user task. Here you can see detailed information, such as the assignment history, updates to the due date and follow-up dates and claiming and unclaiming of tasks. Comments are also displayed here.
- Diagram view - The Diagram tab shows the diagram of the process definition. The current user task is highlighted in this diagram.
- Task description - Open the Description tab to inspect the user task description. Have a look at the BPMN 2.0 reference for more information about descriptions of tasks.